Categories
Instructions

farberware coffee maker instructions

Farberware Coffee Maker Instructions: A Comprehensive Guide

Welcome! This guide provides detailed instructions for various Farberware coffee makers, encompassing models like the FSCM200M, FW61100042831, and FW12-100024366.

It covers setup, brewing, cleaning, and troubleshooting, ensuring optimal performance and longevity of your appliance. Access specific model manuals online for tailored guidance.

Understanding Your Farberware Coffee Maker Model

Farberware offers a diverse range of coffee makers, from classic carafes like the FSCM200M to programmable 12-cup models (FCP240) and even those compatible with K-Cups, such as the FW61100042831. Identifying your specific model is crucial for accessing the correct instructions and ensuring optimal brewing.

The model number is typically located on the underside of the unit or within the water reservoir. Knowing this number allows you to download the precise user manual from the Farberware website or access relevant support resources. Different models feature varying functionalities – some include a “Keep Warm” function, while others boast programmable timers for automated brewing.

Older models, like the 5-Cup Coffee Maker (103743), may have simpler operation compared to newer, more advanced machines. Stainless steel coffee urns require specific attention to cleaning procedures as outlined in their respective manuals. Understanding these distinctions will streamline your coffee-making experience and maximize the lifespan of your Farberware appliance.

Identifying Key Components

Farberware coffee makers, regardless of model, share several key components. The water reservoir, often removable, holds the water for brewing. The filter basket accommodates either a paper filter or a reusable filter for holding coffee grounds. A crucial element is the carafe, designed to collect the brewed coffee – some models utilize glass carafes, while others employ stainless steel.

Programmable models feature a control panel with buttons for power, programming, and brew selection. The heating plate keeps the brewed coffee warm after the brewing cycle completes. Single-serve brewers incorporate a K-Cup holder (for compatible models) to accommodate single-serve coffee pods.

The lid secures the water reservoir and brewing components. Familiarizing yourself with these parts – as detailed in your model’s manual – is essential for proper operation and maintenance. Understanding the function of each component will aid in troubleshooting and ensure a consistently delicious cup of coffee. Regular inspection of these parts is recommended.

Initial Setup and Preparation

Before your first brew, proper setup is crucial for optimal performance. Begin by carefully unpacking your Farberware coffee maker and removing all packaging materials. Place the coffee maker on a stable, level surface, away from water sources and heat. Inspect all components for any damage that may have occurred during shipping.

Ensure the carafe is clean and free of debris. Locate the water reservoir and familiarize yourself with its fill lines. Before using, wash the reservoir, filter basket, and carafe with warm, soapy water. Rinse thoroughly to remove any residue.

Plug the coffee maker into a grounded electrical outlet. It’s recommended to run a full brewing cycle with water only (see “First-Time Use: Cleaning Before Brewing”) to flush out any manufacturing residue. Refer to your specific model’s manual for detailed diagrams and instructions tailored to your Farberware coffee maker. This initial preparation ensures a clean and flavorful first cup.

First-Time Use: Cleaning Before Brewing

Prior to brewing your first pot of coffee, a thorough cleaning cycle is essential to remove any residual manufacturing oils or particles. Fill the water reservoir to its maximum capacity with fresh, clean water. Do not add coffee grounds or a filter during this process.

Place the empty carafe securely on the warming plate. Ensure the filter basket is in place, even though it will remain empty. Turn on the coffee maker and initiate a full brewing cycle as if you were making coffee. Allow the entire cycle to complete, discarding the brewed water once finished.

Repeat this process at least once, and ideally twice, to ensure a completely clean system. This initial flush helps guarantee the purest coffee flavor in subsequent brews. Some manuals suggest this step, particularly for models like the FCP240. This simple step significantly improves the taste and longevity of your Farberware coffee maker.

Water Reservoir and Filter Basket Instructions

The water reservoir is designed for easy filling and accurate measurement. Most Farberware models feature clearly marked water level indicators, corresponding to cup measurements. Always use fresh, cold, filtered water for the best-tasting coffee. Avoid overfilling beyond the maximum line, as this can cause overflow during brewing.

The filter basket accommodates standard paper filters – typically cone-shaped or basket-style, depending on your model. Ensure the filter is properly seated within the basket to prevent grounds from escaping into the brewed coffee. For optimal flavor, rinse the paper filter with water before adding coffee grounds; this removes any papery taste.

Some models, like the Side by Side, are compatible with both ground coffee and K-Cups. When using K-Cups, a separate adapter is required, which fits securely into the filter basket area. Always refer to your specific model’s manual for detailed instructions regarding filter types and K-Cup adapter usage.

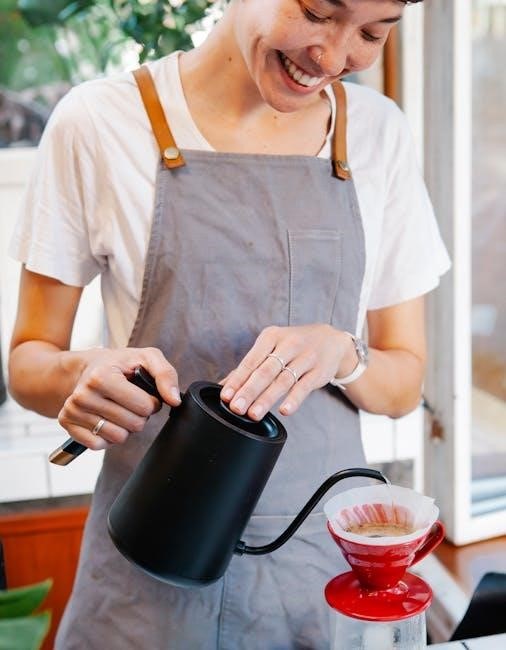
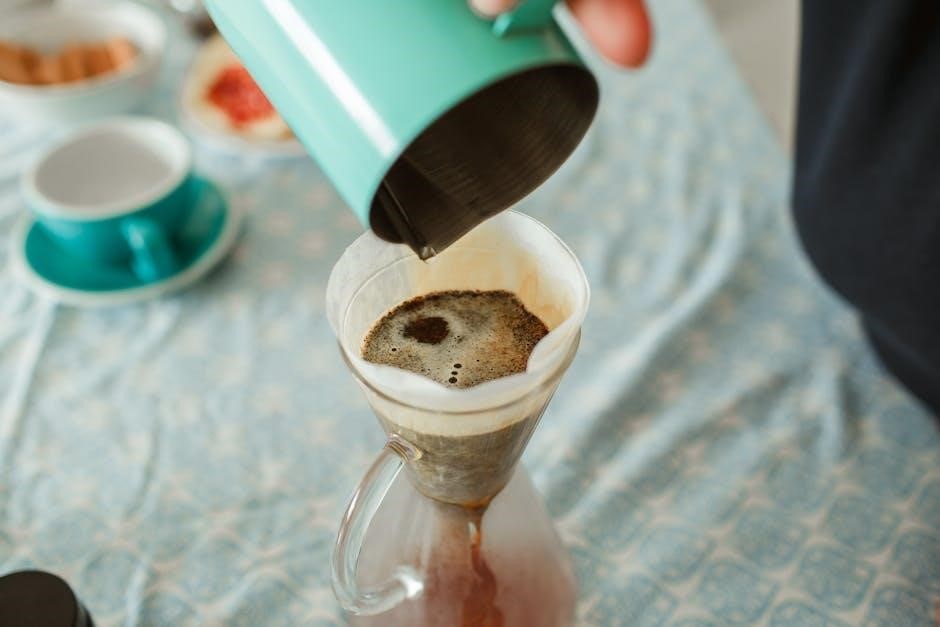
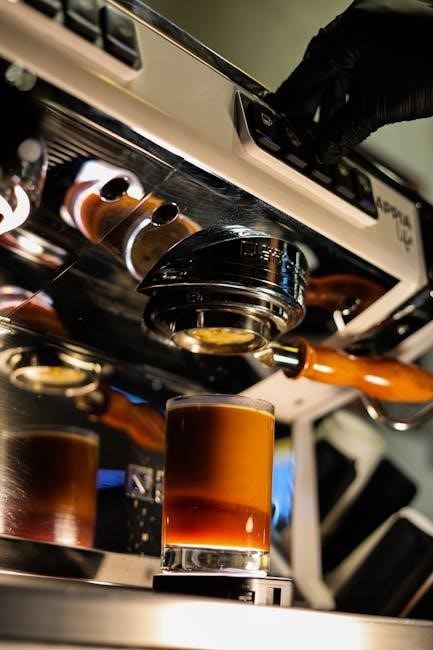
Brewing Coffee: Step-by-Step Guide

Step 1: Fill the water reservoir with the desired amount of fresh, cold water, referencing the cup markings. Step 2: Insert a paper filter into the filter basket, rinsing it beforehand for a cleaner taste. Step 3: Add ground coffee to the filter, using approximately one tablespoon per cup, adjusting to your preference.

Step 4: Ensure the carafe is securely placed on the warming plate. Step 5: For standard brewing, press the power button to initiate the brewing cycle. Programmable models may require selecting a brew strength or size. Step 6: Allow the coffee maker to complete the brewing process; do not interrupt it.

Step 7: Once brewing is finished, the coffee maker will automatically switch to the ‘Keep Warm’ function (if enabled). Carefully pour and enjoy! For K-Cup brewing, insert the K-Cup into the adapter and follow similar steps, ensuring proper adapter placement; Always consult your model’s manual for specific brewing instructions.

Programming the Coffee Maker (For Programmable Models)

Step 1: Press the “Program” or “Set” button – the specific label varies by model. This initiates the programming mode. Step 2: Use the “Hour” and “Minute” buttons to set the desired start time for brewing. Ensure the AM/PM indicator is correct.

Step 3: Some models allow you to select brew strength or the number of cups to brew during programming. Adjust these settings as needed. Step 4: Confirm your settings by pressing the “Program” or “Set” button again. The coffee maker will typically display a confirmation indicator, like a lit “Auto” light.

Step 5: Ensure the water reservoir is filled and the filter basket contains coffee grounds before programming. The coffee maker will automatically begin brewing at the programmed time. To cancel programmed brewing, press the “Program” or “Cancel” button. Refer to your specific model’s manual for detailed programming instructions and button functions.

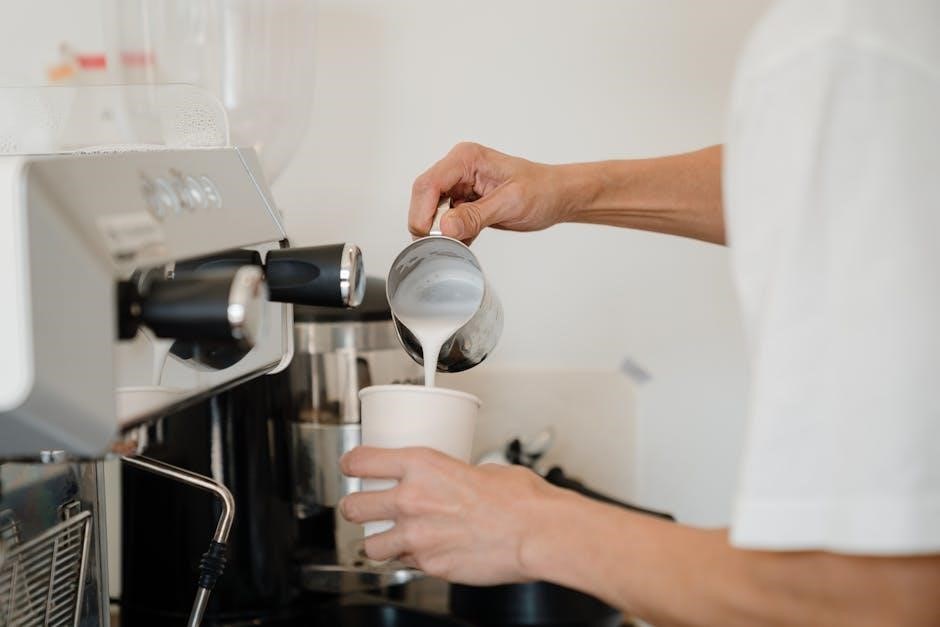
Using the Keep Warm Function

Activating Keep Warm: Most Farberware coffee makers automatically activate the “Keep Warm” function after the brewing cycle completes. This feature maintains the coffee’s temperature for a set period, typically around two hours. Some models require manually pressing a “Keep Warm” button to engage this function.

Temperature Maintenance: The “Keep Warm” function doesn’t reheat the coffee; it maintains the existing temperature. Over extended periods, coffee flavor can degrade even with the keep-warm feature. Duration: The keep-warm duration varies by model. Consult your user manual for the specific time limit.

Automatic Shut-Off: For safety, the keep-warm function will automatically shut off after the designated time. Carafe Removal: Removing the carafe during the keep-warm cycle will usually deactivate the function. Note: Prolonged use of the keep-warm function may slightly alter the coffee’s taste. Regular cleaning is essential for optimal performance.

Brewing with K-Cups (For Compatible Models)

K-Cup Compatibility: Certain Farberware models, like the Side by Side (FW61100042831), offer both traditional drip brewing and single-serve K-Cup functionality. Ensure your model specifically supports K-Cups before proceeding.

K-Cup Adapter: You’ll need a K-Cup adapter, often included with the coffee maker. Insert the adapter into the designated single-serve brewing area. Pod Insertion: Place a K-Cup pod into the adapter. Ensure it’s properly seated.

Water Level: For single-serve brewing, use the appropriate water level markings for a single cup. Brewing Process: Select the single-serve brewing option (if applicable) and initiate the brew cycle. Cleaning: After each K-Cup use, remove and discard the used pod and rinse the adapter. Regular cleaning prevents residue buildup.

Cleaning and Maintenance: Daily Routine

Daily Cleaning is Crucial: After each use, promptly discard used coffee grounds and the paper filter. Rinse the filter basket and carafe with warm, soapy water. Thoroughly dry all components before reassembling.

Carafe Care: Hand wash the carafe to prevent scratching or damage. Avoid abrasive cleaners. Inspect the carafe regularly for cracks or chips; replace if necessary.

Exterior Wipe-Down: Wipe the exterior of the coffee maker with a damp cloth to remove spills and splatters. Avoid getting water inside the unit.

Removable Parts: Most Farberware models feature removable parts for easier cleaning. Consult your manual for specific disassembly instructions. Regular Inspection: Check the spray head for clogs and clean as needed.

Importance of Cleanliness: Consistent daily cleaning prevents mineral buildup and ensures optimal coffee flavor. A clean coffee maker extends its lifespan and delivers a better brewing experience. Refer to your manual for detailed cleaning guidance specific to your model.

Descaling Your Farberware Coffee Maker

Why Descale? Over time, mineral deposits from water accumulate inside your Farberware coffee maker, affecting brewing performance and coffee taste. Descaling removes these deposits, restoring optimal functionality.

Descaling Solution: Use a commercially available descaling solution specifically designed for coffee makers, or a mixture of equal parts white vinegar and water. Follow Solution Instructions: Always adhere to the descaling solution’s instructions for proper dilution and usage.

Descaling Process: Fill the water reservoir with the descaling solution. Run a full brewing cycle without coffee grounds. Repeat with fresh water 2-3 times to rinse thoroughly.

Frequency: Descale your coffee maker every 3-6 months, depending on water hardness. Areas with hard water require more frequent descaling. Refer to Manual: Consult your specific model’s manual for detailed descaling instructions.

Importance of Rinsing: Complete rinsing is vital to remove any residual descaling solution, ensuring your coffee doesn’t taste unpleasant. Regular descaling extends the life of your appliance.

Troubleshooting Common Issues

Coffee Maker Not Turning On: Ensure the unit is properly plugged into a functioning outlet. Check the power cord for damage. If the issue persists, consult the user manual or contact Farberware support.

Coffee Brewing Too Slowly: Mineral buildup (scaling) is a common cause. Descale your coffee maker following the instructions in the manual. Also, ensure the filter basket isn’t overfilled.

Coffee Tastes Weak or Bitter: Use the correct coffee-to-water ratio. Ensure fresh, quality coffee grounds are used. A dirty coffee maker can also affect taste; clean thoroughly.

Water Leaking: Check the carafe is properly positioned. Inspect the water reservoir for cracks or damage. Ensure all parts are correctly assembled.

Error Codes: Refer to the “Error Codes and Their Meanings” section of this guide or your model’s manual for specific code explanations and solutions. Manual is Key: Always consult your specific model’s manual for detailed troubleshooting steps.

Error Codes and Their Meanings

Understanding Error Signals: Farberware coffee makers utilize error codes to indicate specific malfunctions. These codes help pinpoint the issue for quicker resolution. Always refer to your specific model’s manual, as codes vary.

Common Error Codes (Examples): While specifics differ, some common indicators include “E1” or “Error 1” often signaling a descaling need. “E2” or “Error 2” might indicate a water reservoir issue – either empty or improperly seated.

“E3” or “Error 3” could point to a temperature sensor problem, requiring professional service. Some models display “CL” or “Clean” to prompt descaling. A flashing error code often signifies an ongoing issue.

Resetting the System: After addressing the issue (e.g., descaling), unplug the coffee maker for several minutes, then plug it back in to reset the system. If the error persists, document the code and contact Farberware customer support.

Manual is Essential: The most accurate error code definitions are found within your coffee maker’s user manual. Ignoring error codes can lead to further damage.

Replacing the Carafe (If Applicable)

Identifying Carafe Compatibility: If your Farberware coffee maker’s carafe breaks, finding a replacement is crucial. Not all carafes are universally compatible; model-specific replacements ensure proper fit and function.

Where to Purchase: Replacements can be found on the Farberware website, major online retailers (like Amazon or Walmart), and appliance parts stores. Always verify the part number before ordering.

Checking Model Numbers: Locate your coffee maker’s model number (usually on the bottom or back) and search for a carafe specifically designed for that model. Using an incorrect carafe can lead to spills or improper brewing.

Glass vs. Thermal: Determine if your original carafe was glass or thermal. Replacing a glass carafe with a thermal one (or vice versa) may require adjustments or be incompatible.

Safety First: When handling a broken carafe, exercise extreme caution to avoid cuts. Dispose of broken glass responsibly. Ensure the new carafe is securely seated on the warming plate before use.

Safety Precautions and Warnings

Electrical Safety: Always ensure the coffee maker is plugged into a grounded outlet. Never immerse the appliance, cord, or plug in water or other liquids. Avoid using extension cords.

Hot Surfaces: The carafe, warming plate, and certain internal components become extremely hot during and after brewing. Use caution and allow sufficient cooling time before handling. Avoid touching hot surfaces directly; use handles or pot holders.

Supervision Required: Close supervision is necessary when the coffee maker is used near children. Keep the appliance out of reach of children to prevent burns or injuries.

Proper Usage: Only use the coffee maker for its intended purpose – brewing coffee. Do not use it to heat other liquids. Follow all instructions outlined in the user manual.

Cord Safety: Regularly inspect the power cord for damage. If the cord is damaged, it must be replaced by a qualified technician to avoid electrical hazards. Never operate the appliance with a damaged cord.

Unplug When Not In Use: Always unplug the coffee maker from the outlet when not in use and before cleaning. This prevents accidental operation and potential hazards.

Finding Your Specific Model’s Manual Online

Farberware provides comprehensive resources for locating your coffee maker’s specific user manual online. Start by visiting the official Farberware website. Navigate to the “Support” or “Customer Service” section, often found at the bottom of the homepage.

Look for a “Manuals” or “Downloads” area. You’ll typically be prompted to enter your model number – crucial for accurate results. This number is usually located on the underside of the coffee maker or on the original packaging.

If you’re unable to find the manual on the Farberware website, explore third-party manual databases. Websites dedicated to appliance manuals often host a wide range of documents, including those for older models.

Keywords for Searching: When using search engines, include terms like “Farberware coffee maker manual,” followed by your specific model number (e.g., “Farberware FSCM200M manual”).

PDF Format: Most manuals are available in PDF format, requiring a PDF reader (like Adobe Acrobat Reader) to view and download. Ensure your device has a compatible reader installed.

Having the correct manual ensures safe and efficient operation.

Farberware Customer Support Contact Information

For direct assistance with your Farberware coffee maker, several support channels are available. While specific contact details can evolve, here’s a comprehensive overview of how to reach Farberware customer service.

Website Support: Begin by visiting the official Farberware website. Look for a “Contact Us” or “Customer Support” section. This often includes a frequently asked questions (FAQ) database addressing common issues and troubleshooting steps.

Email Support: Farberware typically offers email support. Check the website for the dedicated customer service email address. Be prepared to provide your model number and a detailed description of your issue.

Phone Support: A customer service phone line is usually available during business hours. The phone number can be found on the Farberware website or in your product’s documentation.

Social Media: Farberware may also provide support through social media channels like Facebook or Twitter. However, response times may vary.

Important Note: Have your model number and proof of purchase readily available when contacting support. This will expedite the assistance process.

Prompt support ensures a satisfying coffee experience.

Categories
Manuals

green egg user manual

Big Green Egg User Manual: A Comprehensive Guide

Welcome! This manual provides essential guidance for optimal Big Green Egg performance, covering setup, operation, maintenance, troubleshooting, and advanced cooking techniques for enthusiasts.

The Big Green Egg (EGG) represents a revolutionary cooking experience, blending ancient techniques with modern ceramic technology. More than just a grill, it’s a versatile outdoor kitchen capable of grilling, smoking, baking, and roasting. This comprehensive guide will empower you to unlock the EGG’s full potential. Understanding its unique design – the ceramic construction, precise airflow control, and optional convEGGtor – is key to mastering its capabilities.

Proper charcoal management and regular maintenance, including hinge adjustments with WD-40, ensure years of exceptional cooking. Need help? Customer support resources are readily available.

Understanding the Components

The Big Green Egg comprises several key elements working in harmony. The ceramic Egg itself provides superior heat retention and insulation. The convEGGtor, placed above the charcoal, facilitates indirect cooking and smoking. Precise temperature control relies on the draft door at the base and the top vent, regulating airflow.

A properly filled firebowl with lump charcoal is crucial for successful operation. Maintaining moving parts, like the hinge, with silicon spray ensures smooth lid operation. Familiarizing yourself with these components is vital for optimal performance.

The Egg Itself: Materials and Construction

The Big Green Egg’s core is crafted from high-fired ceramic, chosen for its exceptional heat retention and durability. This material allows for consistent temperatures and efficient charcoal usage. The ceramic shell’s thickness contributes to superior insulation, minimizing temperature fluctuations.

The Egg’s robust construction ensures longevity, withstanding extreme temperatures and outdoor conditions. Its unique shape promotes natural convection, distributing heat evenly. Understanding the ceramic’s properties is key to maximizing your cooking experience and achieving optimal results.

ConvEGGtor: Purpose and Placement

The ConvEGGtor is a crucial component, transforming your Big Green Egg into a versatile cooking system; It functions as a heat deflector, enabling indirect cooking methods like roasting and smoking. Proper placement is vital; position it leg-side up for deflecting heat, and leg-side down for open-grill direct cooking.

The ConvEGGtor maximizes the Egg’s functionality, allowing for a wider range of culinary possibilities. It also helps to prevent flare-ups and ensures even heat distribution. Experiment with different configurations to master various cooking styles.

Draft Door & Top Vent: Controlling Airflow

Airflow management is paramount for Big Green Egg operation. The draft door at the base and the top vent work in tandem to regulate temperature; Opening both increases airflow, raising the temperature, while closing them reduces it. Precise adjustments are key to maintaining desired cooking temperatures.

Oxygen is crucial; insufficient airflow is a common issue. Experiment with small adjustments to both vents to find the sweet spot for your desired cook. Remember, controlling airflow is the foundation of successful Big Green Egg cooking.

Getting Started: First-Time Use

Initial setup is straightforward. Begin by filling half of your Big Green Egg firebowl with fresh lump charcoal – avoid briquettes for optimal results. Light the charcoal, allowing it to fully ignite before proceeding. Once lit, place the convEGGtor and grill grate securely inside the Egg.

This initial burn-in period seasons the Egg. Achieving stable temperatures requires practice; start with small adjustments to the draft door and top vent. Familiarize yourself with how airflow impacts heat control for successful cooking.

Lighting the Charcoal: Methods and Best Practices

Successfully lighting your Big Green Egg charcoal is crucial. Many users employ electric starters, placing them directly into the lump charcoal. Alternatively, chimney starters work effectively, transferring hot coals into the Egg. Avoid lighter fluids, as they impart unwanted flavors.

Ensure adequate airflow by partially opening the draft door during lighting. If experiencing difficulty, remember oxygen is often the issue – adjust vents accordingly. Allow sufficient time for the charcoal to fully ignite, indicated by a grey ash coating, before cooking.

Achieving Stable Temperatures

Maintaining consistent temperatures is key to successful Big Green Egg cooking. Begin by establishing a target temperature, then carefully adjust the top and draft vents. Smaller adjustments are preferable to large swings. The ConvEGGtor plays a vital role; its position influences heat distribution and stability.

Monitor the temperature using a reliable thermometer. Remember that lid openings cause temperature fluctuations, so minimize them. Sufficient charcoal quantity is also essential; insufficient heat means insufficient smoke and temperature control.

Maintaining Your Big Green Egg

Regular maintenance ensures longevity and peak performance. Utilize quality lump charcoal for optimal results, managing the quantity to suit your cooking needs. Keep moving metal parts, like the hinge and draft door, lubricated with WD-40 or silicon spray to prevent sticking.

Cleaning the grill grate after each use prevents buildup and ensures food safety. Proper charcoal disposal is crucial; allow ashes to cool completely before discarding. Consistent care will maximize your Big Green Egg experience.

Charcoal Management: Types and Quantity

Lump charcoal is highly recommended for the Big Green Egg, providing superior heat and flavor. Begin by filling half of the firebowl with fresh lump charcoal for most cooks. Insufficient charcoal leads to insufficient heat and smoke, impacting cooking results.

Monitor charcoal levels during extended cooks, adding more as needed to maintain stable temperatures. Proper charcoal management is key to achieving consistent cooking performance and maximizing the Egg’s efficiency.

Cleaning and Seasoning the Grill Grate

After each use, allow the grill grate to cool slightly before cleaning. Remove any food residue with a grill brush. Avoid harsh detergents, as they can affect the flavor of future cooks. Regularly seasoning the grate with a high-heat oil, like canola or vegetable oil, prevents sticking and promotes even cooking.

A well-seasoned grate contributes to a better sear and easier food release. Maintaining a clean and seasoned grate ensures optimal performance and longevity of your Big Green Egg.

Troubleshooting Common Issues

Encountering problems with your Big Green Egg is normal. Temperature fluctuations often stem from airflow adjustments – too much or too little ventilation. Difficulty lighting usually indicates insufficient oxygen; ensure vents aren’t overly restricted. Lid issues, like stiffness, frequently require hinge adjustments or lubrication with WD-40 or silicone spray.

Addressing these common concerns promptly ensures a seamless cooking experience. Remember to consult the full manual or Big Green Egg support for more complex issues and detailed solutions.

Temperature Control Problems: Too Hot or Too Cold

If your Big Green Egg runs too hot, partially close the top vent to reduce airflow. Conversely, for lower temperatures, open the vent further. Insufficient charcoal can also cause low temperatures; add more lump charcoal. Remember, oxygen is key – restricted airflow leads to temperature drops.

Stable temperatures require practice and precise vent control. Monitor the thermometer closely and make small adjustments. Consistent charcoal quality also impacts temperature regulation, so use a reliable source.

Difficulty Lighting the Charcoal

If you struggle to light the charcoal, ensure adequate airflow by fully opening both the draft door and top vent initially. Use natural fire starters; avoid lighter fluids. Fill at least half the firebowl with lump charcoal for sufficient mass. If it still won’t ignite, check for damp charcoal – moisture hinders combustion.

Proper lighting requires oxygen. A chimney starter is highly recommended for consistent, even ignition. Allow the charcoal to fully light before adjusting vents for temperature control.

Lid Opening/Closing Issues & Hinge Adjustment

A challenging lid operation often stems from hinge tension. If the lid is difficult to open or close, adjustment is needed. Inspect the hinges for debris or rust, cleaning and lubricating with WD-40 or silicone spray. Tighten or loosen the hinge bolts incrementally to modify tension.

Ensure the Egg is on a level surface; uneven ground impacts lid movement. Regularly maintain moving parts to prevent sticking. Proper adjustment ensures smooth, effortless operation and preserves the Egg’s integrity.

Advanced Techniques

Elevate your cooking with advanced Big Green Egg techniques! Explore the art of smoking, utilizing wood chips or chunks for nuanced flavor profiles. Experiment with the firebowl, adapting it for versatile cooking styles – direct, indirect, and hybrid methods.

Master temperature control for precise results. Utilize the convEGGtor for indirect cooking and heat deflection. Combine wood types for complex smoke rings. These techniques unlock the Egg’s full potential, transforming you into a true kamado master.

Smoking with Wood Chips & Chunks

Enhance your dishes with authentic smoky flavors! Wood chips deliver quick, intense smoke, ideal for shorter cooks, while chunks provide a longer-lasting, more subtle smoke. Experiment with hickory, mesquite, apple, cherry, and pecan woods to discover unique profiles.

Add wood directly to the charcoal, or use a smoker box for controlled smoke generation. Insufficient heat means insufficient smoke, so ensure proper charcoal lighting and temperature stability. Remember, charcoal check is vital for optimal smoke!

Using the Firebowl for Different Cooking Styles

The Big Green Egg’s firebowl versatility extends beyond traditional grilling. Remove the convEGGtor for direct heat searing, perfect for steaks and burgers. Reinstall it leg-level for indirect cooking, ideal for ribs, poultry, and roasts.

Adjusting the firebowl height influences temperature and cooking time. Fill half the firebowl with lump charcoal for consistent heat. Experiment with different configurations to master various techniques and unlock the Egg’s full potential for diverse culinary creations!

Safety Precautions

Extreme caution is vital when operating your Big Green Egg. Always use heat-resistant gloves when handling hot surfaces, including the Egg itself, grill grate, and cooking tools. Never leave a lit Egg unattended, and keep children and pets at a safe distance.

Dispose of cooled charcoal ashes responsibly, ensuring complete extinguishment before discarding. Regularly inspect the Egg and its components for damage. Maintain moving parts with lubricants like WD-40 to prevent malfunctions and ensure safe operation. Prioritize safety for enjoyable cooking!

Handling Hot Surfaces

The Big Green Egg reaches incredibly high temperatures, demanding utmost care. Always utilize high-quality, heat-resistant gloves when interacting with the Egg, grill grate, or any cooking accessories. Avoid touching metal components directly, even if they appear cool;

Exercise caution when opening the lid, as a rush of hot air will escape. Keep a safe distance and angle your body away from the opening. Never attempt to move a hot Egg; allow it to cool completely before handling. Prioritize personal safety during every cooking session.

Proper Charcoal Disposal

Ashes from the Big Green Egg retain heat for extended periods, requiring careful disposal. Never deposit hot ashes into plastic or combustible containers. Allow the charcoal to cool completely – this can take 48-72 hours – before handling.

Once cooled, place the ashes in a metal container with a tight-fitting lid. Wetting the ashes slightly can further ensure complete extinguishment. Dispose of the container responsibly, following local regulations for ash disposal. Prioritize safety and prevent potential fire hazards.

Resources and Support

Need assistance with your Big Green Egg? Our dedicated Customer Support page offers a wealth of information, including frequently asked questions, detailed product guides, and comprehensive warranty details. You’ll also find expert assistance readily available to address any concerns you may have.

Explore recommended accessories to enhance your cooking experience and unlock the full potential of your Egg. Visit our website or contact us directly for prompt and helpful support – we’re here to help you succeed!

Big Green Egg Customer Support

Experiencing issues or have questions? Our Customer Support team is dedicated to providing exceptional assistance. We offer a comprehensive online resource center filled with FAQs addressing common concerns and detailed product guides to walk you through every step.

For personalized help, don’t hesitate to contact us directly. We’re committed to ensuring your Big Green Egg experience is enjoyable and successful. Reach out for expert advice and prompt solutions to any challenges you encounter!

Warranty Information

Protecting Your Investment: Big Green Egg offers a limited lifetime warranty on the ceramic Egg itself, ensuring lasting quality and peace of mind. This warranty covers defects in materials and workmanship under normal use.

Components like the lid, metal parts, and accessories are covered by a shorter warranty period. Please retain your proof of purchase for warranty claims. Full warranty details, including exclusions and claim procedures, are available on our website. We stand behind the durability of our products!

Recommended Accessories

Enhance Your EGG Experience: To maximize your Big Green Egg’s versatility, consider essential accessories. A convEGGtor is crucial for indirect cooking and heat management. Grill grates, pizza stones, and cast iron cookware expand cooking options.

For smoking, wood chips or chunks add delicious flavor. Don’t forget tools like tongs, brushes, and a reliable thermometer. Protective covers safeguard your Egg from the elements. Explore our full range to unlock the full potential of your ceramic cooker!

Categories
Guide

dead island 2 trophy guide

Dead Island 2 Trophy Guide: A Comprehensive Overview (12/09/2025)

Dead Island 2 boasts 46 trophies, including a Platinum, three Gold, ten Silver, and numerous Bronze awards, demanding dedication and skill from players.

Dead Island 2’s trophy list presents a thrilling challenge for completionists, demanding mastery of its brutal combat and exploration of the HELL-A landscape. The game features a robust collection of 45 achievements and 46 trophies, culminating in the prestigious Platinum reward.

Successfully unlocking all trophies requires players to engage with all facets of the game, from slaying hordes of zombies and perfecting weapon skills to uncovering hidden lore and fully upgrading safe houses. Expect a mix of easily obtainable Bronze trophies early on, alongside demanding Gold challenges that test your skills.

This guide will provide a detailed breakdown of each trophy, offering strategies and tips to help you achieve 100% completion. Prepare for a lengthy, but rewarding, journey through the zombie-infested streets of Los Angeles!

Platinum Trophy: “Here Comes the Pain” ⎻ Overview

The coveted Platinum trophy, “Here Comes the Pain,” in Dead Island 2, represents the ultimate achievement for dedicated players. Unlocking it demands completing all other trophies within the game, signifying a comprehensive mastery of its challenging gameplay loop.

Expect a significant time investment – estimated completion times range considerably, but typically fall between 40-60 hours, depending on skill and efficiency. The path to Platinum requires diligent exploration, skillful combat, and a commitment to completing every side quest and challenge.

Prepare to fully upgrade your skills, craft every weapon, and conquer all Zombie Challenges. This trophy isn’t about luck; it’s a testament to your dedication and zombie-slaying prowess in HELL-A!

Gold Trophies: Challenging Achievements

Dead Island 2’s Gold trophies represent substantial hurdles, demanding significant player effort and skill. These aren’t quick wins; they require focused dedication and a deep understanding of the game’s mechanics. Earning these signifies a high level of accomplishment within the zombie-infested world of HELL-A.

The three Gold trophies – “Fully Equipped,” “Style Points,” and “Slayer” – each present unique challenges. “Fully Equipped” necessitates finding all weapon mods, while “Style Points” tests your mastery of weapon skills. Finally, “Slayer” demands reaching the maximum player level, a feat of endurance and combat prowess.

Prepare for extensive exploration, skillful combat, and a considerable time commitment to unlock these prestigious awards. They truly separate the casual players from the dedicated zombie hunters!

“Fully Equipped” ⎻ Finding All Weapon Mods

“Fully Equipped” is a demanding Gold trophy in Dead Island 2, requiring players to locate every single weapon mod scattered throughout HELL-A. This isn’t a simple task; mods are hidden in containers, dropped by challenging enemies, and awarded through completing various activities. Expect a significant scavenger hunt across all zones.

Players must meticulously explore each location, checking every nook and cranny for hidden caches. Utilizing skills that reveal nearby loot can be incredibly helpful. Remember to consistently check vendors, as they occasionally stock rare mods.

Persistence and thoroughness are key to unlocking this trophy. Prepare for a lengthy search, but the satisfaction of a fully modded arsenal is well worth the effort!

“Style Points” ─ Mastering Weapon Skills

Achieving the “Style Points” Gold trophy in Dead Island 2 demands mastery of the game’s weapon skills. Each weapon type – bladed, blunt, impact, and firearms – features a unique skill tree with numerous abilities to unlock. Players must fully upgrade all skills across every weapon category.

This requires significant investment in skill points, earned through leveling up and completing challenges. Experiment with different skill combinations to find a playstyle that suits you. Don’t neglect any weapon type; even seemingly less useful skills contribute to overall progression.

Strategic skill allocation and consistent gameplay are crucial for unlocking this rewarding trophy, showcasing true combat proficiency.

“Slayer” ⎻ Reaching Maximum Level

The “Slayer” Gold trophy in Dead Island 2 is a testament to dedication, requiring players to reach the maximum level of 30. Leveling up is primarily achieved by earning XP through completing missions, side quests, and eliminating zombies. The higher the difficulty, the more XP you’ll receive, accelerating your progress.

Focus on consistently engaging with content and utilizing XP-boosting perks when available. Don’t shy away from challenging encounters, as they offer substantial rewards. Remember to fully explore each area to uncover hidden quests and collectibles that contribute to your overall XP gain.

Reaching level 30 signifies mastery of the game’s progression system.

Silver Trophies: Core Gameplay Milestones

Dead Island 2’s Silver trophies represent significant accomplishments within the core gameplay loop. “Zombologist” demands unlocking every zombie type in the Zompedia, encouraging thorough exploration and combat. “On Safari” requires completing the first tier of every Zombie Challenge, testing adaptability. “Fully Booked” tasks players with discovering all lore collectibles, enriching the narrative experience.

“Home Sweet Hell” focuses on upgrading your Safe House, providing strategic advantages. “Skill Issue” challenges you to unlock all skills, maximizing character potential. “Fully Forged” involves crafting every weapon, showcasing mastery of the crafting system. Finally, “The Cleaner” requires completing all side missions, demonstrating commitment to the world.

“Zombologist” ─ Completing the Zompedia

“Zombologist” is a Silver trophy in Dead Island 2, earned by unlocking every single zombie type within the game’s comprehensive Zompedia. This requires encountering and successfully identifying each unique infected variant scattered throughout HELL-A. Players must actively seek out and defeat these zombies, then scan them using the Zompedia function to add them to their collection.

Expect to face a diverse range of undead, from standard walkers to specialized apex predators. Thorough exploration of all areas, completing side quests, and engaging with the various zombie challenges are crucial for unlocking this trophy. It’s a testament to your dedication to understanding the game’s gruesome inhabitants!

“On Safari” ─ Zombie Challenge Tier 1 Completion

The “On Safari” Silver trophy in Dead Island 2 challenges players to complete the first tier of every Zombie Challenge available throughout the game. These challenges present unique combat scenarios, demanding skillful use of weapons, abilities, and environmental awareness. Each challenge focuses on eliminating specific zombie types under particular conditions, testing your adaptability and precision.

Successfully completing Tier 1 of each challenge demonstrates a solid grasp of the game’s combat mechanics and zombie behaviors. Players should prioritize locating and tackling these challenges early on, as they offer valuable experience and rewards alongside the trophy. Prepare for intense battles and strategic thinking!

“Fully Booked” ⎻ Discovering All Lore Collectibles

Earning the “Fully Booked” Silver trophy in Dead Island 2 requires diligent exploration and a keen eye for detail. Players must uncover all hidden lore collectibles scattered throughout the game’s expansive world of HELL-A. These collectibles, often found in obscure locations, provide deeper insights into the game’s narrative, characters, and the origins of the zombie outbreak.

Thoroughly search every nook and cranny of each location, paying attention to environmental clues and hidden pathways. Utilizing a map or online guide can be helpful, but discovering them organically enhances the experience. Collecting all lore pieces unlocks a richer understanding of the story, alongside the coveted trophy!

“Home Sweet Hell” ⎻ Safe House Upgrades

Securing the “Home Sweet Hell” Silver trophy in Dead Island 2 demands a commitment to fortifying your sanctuary. Players must fully upgrade all available Safe Houses throughout the game’s campaign. These upgrades provide crucial benefits, including fast travel access, weapon workbenches, and crafting stations, significantly aiding your survival against the relentless zombie hordes.

Each Safe House requires specific resources and a certain amount of progress to unlock all upgrades. Prioritize gathering materials and completing relevant quests to expedite the process. A fully upgraded Safe House network is invaluable, and achieving this milestone unlocks both the trophy and a substantial advantage in HELL-A.

“Skill Issue” ⎻ Unlocking All Skills

The “Skill Issue” Silver trophy in Dead Island 2 challenges players to master the game’s robust skill system. To obtain this achievement, you must unlock every single skill available across all skill trees. This requires diligent exploration, completing missions, and earning enough skill points through leveling up and participating in challenges.

Strategic skill allocation is crucial for optimizing your character build and tackling the increasingly difficult encounters. Experiment with different skill combinations to find what suits your playstyle best. Unlocking all skills not only grants the trophy but also transforms you into a formidable slayer, ready to face any undead threat.

“Fully Forged” ─ Crafting All Weapons

Securing the “Fully Forged” Silver trophy in Dead Island 2 demands a commitment to weapon crafting. Players must successfully craft every weapon available within the game, showcasing mastery of the crafting system and resource management. This involves scavenging for blueprints and materials scattered throughout HELL-A, and utilizing workbenches found in safe houses.

Crafting isn’t just about unlocking the trophy; it’s essential for creating powerful and customized weapons to overcome the diverse zombie hordes. Experiment with different modifications and combinations to forge the ultimate arsenal. Diligence and thorough exploration are key to becoming a true weaponsmith in the zombie-infested city.

“The Cleaner” ⎻ Completing All Side Missions

Earning the Silver trophy, “The Cleaner”, in Dead Island 2 requires dedication to the citizens of HELL-A. Players must complete every single side mission available throughout the game’s open world. These missions offer unique stories, challenges, and rewards, enriching the overall gameplay experience beyond the main storyline.

Don’t overlook any seemingly minor quests, as each contributes to the completion of this trophy. Thoroughly explore each district, interact with NPCs, and accept every available task. Successfully finishing all side missions demonstrates a commitment to helping those in need amidst the zombie apocalypse, and unlocks valuable rewards.

Bronze Trophies: Early Game & Specific Tasks

Dead Island 2’s Bronze trophies are typically acquired early in the game or through specific, straightforward actions. “First Blood” is awarded upon killing your first zombie, a guaranteed early achievement. “Headhunter” requires 50 headshots, encouraging precision aiming, while “Drop Dead” demands 200 zombie dismemberments, promoting aggressive combat tactics.

These trophies serve as introductory goals, familiarizing players with the core mechanics. They don’t demand significant skill or time investment, making them accessible to all players. Focusing on these early achievements provides a sense of progression and encourages continued engagement with the game’s combat system.

“First Blood” ─ Killing Your First Zombie

“First Blood” is arguably the easiest trophy in Dead Island 2, a guaranteed reward for any new player venturing into the zombie-infested HELL-A. Awarded simply for eliminating your very first zombie, it’s an unavoidable milestone within the opening moments of the game. No specific strategy or skill is required; simply engage and defeat any of the shambling undead that cross your path.

This trophy serves as a gentle introduction to the game’s combat system, encouraging players to experiment with weapons and abilities. It’s a quick and satisfying achievement, providing immediate positive reinforcement and setting the stage for the challenges ahead. Consider it a warm welcome to the brutal world of Dead Island 2!

“Headhunter” ─ 50 Headshots

The “Headhunter” trophy in Dead Island 2 challenges players to demonstrate precision by landing 50 successful headshots on zombies. While seemingly straightforward, achieving this requires deliberate aiming and understanding of zombie behavior. Utilizing weapons with good accuracy, like pistols or rifles, is highly recommended.

Focus on aiming for the head, taking advantage of the game’s slow-motion effect during dodges to line up shots. Certain zombie types, like those with helmets, may require more attempts. This trophy encourages players to improve their aiming skills, a valuable asset throughout the entire game. Patience and practice are key to unlocking this achievement!

“Drop Dead” ⎻ 200 Zombie Dismemberments

Earning the “Drop Dead” trophy in Dead Island 2 requires a gruesome tally: 200 zombie dismemberments. This isn’t about clean kills; it’s about strategically severing limbs! Blunt weapons, like hammers and baseball bats, are exceptionally effective for achieving this, as are weapons with high impact force.

Focus on targeting limbs – arms and legs are easiest – and swing with precision; Certain attacks and weapon skills can enhance dismemberment chances. Don’t be afraid to get up close and personal with the undead! This trophy encourages aggressive, visceral combat, rewarding players for embracing the game’s over-the-top gore. It’s a delightfully messy milestone.

Missable Trophies & Important Considerations

Several Dead Island 2 trophies are easily missed, demanding careful attention during your playthrough. “Fully Booked”, requiring all lore collectibles, is a prime example – failing to find them all necessitates a second playthrough or extensive backtracking. Similarly, side missions are missable; complete “The Cleaner” before reaching the final mission.

Zombie Challenges, particularly tier completions like “On Safari”, should be prioritized as they can be locked out. Always explore thoroughly and engage with all content as it becomes available. Consider using a guide to ensure no collectibles or opportunities are overlooked. Play on a difficulty that balances challenge and enjoyment!

Trophy Difficulty & Estimated Completion Time

The Dead Island 2 trophy list is considered a moderate to challenging undertaking, landing around a 6/10 in difficulty. The Platinum trophy requires significant time investment and dedication to completing all aspects of the game. Expect to spend approximately 40-60 hours achieving 100% completion, depending on your skill level and playstyle.

Grinding for weapon mods and skill points contributes substantially to the completion time. Thorough exploration and diligent completion of side quests are crucial. A well-planned approach, utilizing guides and optimizing gameplay, can significantly reduce the overall time needed.

Useful Resources & Links for Trophy Hunters

For dedicated Dead Island 2 trophy hunters, several online resources prove invaluable. PowerPyx offers a comprehensive trophy guide, detailing each achievement and providing helpful strategies. The Dead Island 2 official website serves as a central hub for game information and updates.

YouTube channels like HarryNinetyFour and others provide video walkthroughs for particularly challenging trophies, offering visual guidance. Online forums, such as Reddit’s r/deadisland, foster a community where players share tips and assistance. Utilizing these resources will streamline your trophy-hunting journey and ensure a smoother path to Platinum.

Categories
PDF

rosenbaum pearl investment banking pdf

Rosenbaum Pearl Investment Banking: A Comprehensive Overview (as of 12/09/2025)

Rosenbaum Pearl offers detailed financial insights, potentially available in PDF reports, leveraging expertise from legal accolades and a diverse background—including film and real estate.

Rosenbaum Pearl Investment Banking is a firm navigating the complex world of financial advisory, drawing upon a unique blend of experience. While founder Michael Rosenbaum is widely recognized for his acting career – notably as Lex Luthor in Smallville – the firm itself is dedicated to providing sophisticated financial solutions. Information regarding their services, transaction details, and firm philosophy may be accessible through comprehensive PDF documents available upon request.

The firm’s approach appears to be rooted in a commitment to personalized service, potentially extending to real estate investment guidance. Legal recognition, including accolades from Florida Trend and Law & Politics Magazine, suggests a strong foundation in regulatory compliance and legal expertise. These resources, often detailed in PDF format, showcase their capabilities.

II. Firm History and Founding Principles

Rosenbaum Pearl’s history is intriguing, stemming from the diverse background of its founder, Michael Owen Rosenbaum. Known for his acting roles, including the iconic Lex Luthor, his transition to investment banking represents a significant career shift. The firm’s founding principles likely blend analytical rigor with a client-centric approach, potentially detailed in introductory PDF materials.

While the exact origins are not fully detailed publicly, the firm’s name suggests a partnership, with “Pearl” representing a key figure. The firm’s commitment to providing accessible information, potentially through downloadable PDF reports, indicates a dedication to transparency. Understanding the firm’s evolution is crucial, and foundational documents are likely available in PDF format.

III. Core Investment Banking Services

Rosenbaum Pearl likely provides a suite of core investment banking services, potentially outlined in a comprehensive service overview PDF. These typically include Mergers & Acquisitions (M&A) advisory, assisting clients with buying, selling, or merging businesses. Private Placement of Debt & Equity services help companies raise capital without public offerings, details of which may be found in a dedicated PDF guide.

Financial Restructuring services are also probable, aiding companies facing financial challenges; Information regarding these services, including case studies and process explanations, could be available as downloadable PDF documents. The firm’s expertise, stemming from a diverse background, likely informs a tailored approach, potentially detailed in client-facing PDF materials.

III.A. Mergers & Acquisitions (M&A) Advisory

Rosenbaum Pearl’s M&A advisory services likely encompass all stages of a transaction, potentially detailed in a specialized PDF report. This includes target identification, valuation, negotiation, and due diligence. Given Michael Rosenbaum’s background, a nuanced understanding of deal dynamics is probable. A PDF outlining their M&A process could highlight their strategic approach.

They likely assist both buyers and sellers, offering tailored solutions. Information on past M&A deals, potentially presented as case studies within a PDF format, would demonstrate their expertise. Their legal recognition suggests a strong focus on compliance, likely emphasized in their advisory PDF materials.

III.B. Private Placement of Debt & Equity

Rosenbaum Pearl facilitates private placements of both debt and equity, connecting companies with suitable investors. A comprehensive PDF document likely details their capabilities in structuring these offerings, navigating regulatory hurdles, and preparing offering materials. Their real estate investment focus suggests experience in capital raising for property ventures, potentially showcased in a PDF case study.

They likely cater to a range of companies, from startups to established businesses. A PDF outlining their investor network would be valuable. Given the firm’s legal background, compliance is paramount, likely detailed within their private placement PDF resources.

III.C. Financial Restructuring Services

Rosenbaum Pearl provides financial restructuring services, assisting companies facing financial distress. A detailed PDF report would likely outline their approach, encompassing debt renegotiation, bankruptcy advisory, and operational improvements. Their legal expertise, highlighted by Florida’s “Legal Elite” recognition, is crucial in navigating complex restructuring processes, potentially detailed in a downloadable PDF guide.

They may specialize in restructuring for specific industries, like healthcare or real estate, with relevant case studies available as PDFs. A PDF outlining their turnaround strategies and experience would be beneficial for potential clients seeking financial stabilization.

IV. Industry Focus Areas

Rosenbaum Pearl concentrates on key sectors, offering specialized investment banking services. A comprehensive PDF document likely details their expertise in healthcare, technology, and consumer products/retail. Given Michael Rosenbaum’s background, a PDF might highlight connections within the entertainment industry, potentially aiding media & entertainment clients.

Their real estate focus, aiming for “hassle-free” investing, could be outlined in a dedicated PDF brochure. These industry-specific PDFs would showcase successful transactions and demonstrate a deep understanding of each sector’s unique challenges and opportunities, attracting targeted clientele.

IV.A. Healthcare Investment Banking

Rosenbaum Pearl’s healthcare investment banking services are likely detailed in a specialized PDF report. This document would showcase M&A advisory, private placements, and restructuring expertise within the sector. Given Florida legal recognition, a PDF could emphasize regulatory compliance and navigating complex healthcare laws.

The PDF would likely feature case studies – mirroring the broader firm approach – illustrating successful transactions. It may also highlight their understanding of evolving healthcare trends. Expect details on valuation methodologies specific to healthcare companies, presented clearly within the PDF for potential clients.

IV.B. Technology Investment Banking

Rosenbaum Pearl’s technology investment banking practice is potentially outlined in a comprehensive PDF document. This report would detail their capabilities in advising tech companies on mergers, acquisitions, and capital raising. Considering Michael Rosenbaum’s background in entertainment – a tech-adjacent industry – the PDF might showcase relevant experience.

The PDF would likely emphasize understanding disruptive technologies and navigating the fast-paced tech landscape. Expect details on valuation techniques tailored for tech firms, alongside case studies of successful private placements. Legal expertise, highlighted in firm accolades, would be presented within the PDF, ensuring compliance.

IV.C. Consumer Products & Retail Investment Banking

A detailed PDF report from Rosenbaum Pearl would likely showcase their consumer products & retail investment banking services. This document could highlight expertise in advising brands on strategic transactions, potentially leveraging insights from the firm’s diverse background. Considering Michael Rosenbaum’s public profile, the PDF might subtly emphasize understanding consumer behavior.

The PDF would detail services like M&A advisory for retail businesses and private placements for consumer brands. Expect analysis of market trends and valuation methodologies specific to this sector; Legal accolades, detailed elsewhere, would reinforce the firm’s commitment to compliant transactions, all within the PDF.

V. Rosenbaum Pearl’s Deal Process

A comprehensive PDF outlining Rosenbaum Pearl’s deal process would likely detail a phased approach. Initial consultation and engagement, valuation, and marketing would be clearly defined. Given Michael Rosenbaum’s background, the PDF might emphasize a client-centric, communicative approach. Expect a section on identifying potential buyers or investors, potentially referencing successful past transactions.

The PDF would also cover due diligence, negotiation, and closing procedures. Legal compliance, supported by the firm’s legal recognitions, would be a key component. A visual flowchart illustrating the process would enhance clarity, all contained within the downloadable PDF document.

V.A. Initial Consultation & Engagement

A Rosenbaum Pearl PDF detailing initial consultations would likely emphasize a personalized approach, potentially leveraging Michael Rosenbaum’s communication skills honed in film and television. The PDF would outline the information required from clients – financial statements, business plans, and strategic goals. Expect a description of confidentiality agreements and the firm’s commitment to discretion.

The engagement process, as detailed in the PDF, would cover scope of work, timelines, and preliminary fee structures. It would highlight Rosenbaum Pearl’s industry focus and expertise, assuring clients of a tailored strategy. A clear explanation of next steps would conclude this section.

V.B. Valuation & Financial Analysis

A Rosenbaum Pearl PDF on valuation would detail methodologies employed – discounted cash flow, precedent transactions, and comparable company analysis. It would emphasize a rigorous approach, potentially benefiting from the firm’s legal expertise and analytical rigor. The PDF would explain how financial modeling is used to project future performance and assess risk.

Expect a section outlining key valuation drivers specific to each industry, drawing on Rosenbaum Pearl’s focus areas like healthcare and technology. The document would clarify how the firm arrives at a fair market value, providing clients with a transparent and defensible assessment. Sensitivity analysis details would also be included.

V.C. Marketing & Buyer/Investor Identification

A Rosenbaum Pearl PDF outlining their marketing process would detail a targeted approach to identifying potential buyers or investors. Leveraging industry knowledge – healthcare, tech, consumer products – they’d create compelling marketing materials, potentially highlighting the firm’s founder’s public profile for increased visibility.

The PDF would explain their database of strategic and financial acquirers, alongside proactive outreach strategies. Expect details on confidentiality agreements and the management of the data room. Rosenbaum Pearl likely emphasizes a discreet process, protecting client interests while maximizing exposure to qualified parties, potentially referencing real estate investment networks.

VI. Key Personnel & Leadership

A Rosenbaum Pearl Investment Banking PDF profile would prominently feature Michael Rosenbaum, detailing his transition from acting (known for “Smallville” and Lex Luthor) to finance. It would highlight his legal recognitions – “Legal Elite,” “Florida Super Lawyer” – establishing credibility.

The PDF would likely include bios of Pearl and other senior management, emphasizing their investment banking experience. Expect details on educational backgrounds and previous roles. Given Rosenbaum’s diverse background, the document might subtly leverage his public persona to build trust and demonstrate a unique perspective within the financial sector, potentially linking to real estate ventures.

VI.A. Michael Rosenbaum – Background & Role

A Rosenbaum Pearl Investment Banking PDF dedicated to Michael Rosenbaum would detail his surprising career pivot. It would showcase his acting background – notably, playing Lex Luthor in “Smallville” – alongside his legal accolades (“Legal Elite,” “Florida Super Lawyer”).

The PDF would emphasize his role within the firm, likely as a founding partner or key decision-maker. Expect details on his financial education and experience, bridging the gap between entertainment and investment banking. His unique profile could be positioned as a strength, attracting clients seeking a non-traditional financial advisor.

VI.B. Pearl – Background & Role (if applicable)

A Rosenbaum Pearl Investment Banking PDF focusing on “Pearl” (assuming a co-founder) would require thorough research, as publicly available information is limited. The document would detail their financial expertise, potentially highlighting experience recognized by publications like “Law & Politics Magazine” or “The South Florida Legal Guide.”

The PDF would outline Pearl’s specific role within the firm – perhaps specializing in a particular industry or service offering. It would emphasize their contributions to Rosenbaum Pearl’s success, detailing any leadership positions or key transactions they’ve spearheaded. If “Pearl” refers to a team or department, the PDF would clarify its function.

VI.C. Senior Management Team Profiles

A comprehensive Rosenbaum Pearl Investment Banking PDF would dedicate a section to detailed profiles of the senior management team. For Michael Rosenbaum, this would extend beyond his acting career (“Smallville’s” Lex Luthor) to emphasize his financial acumen and legal recognitions – “Florida Legal Elite” and “Florida Super Lawyer” status.

Each profile within the PDF would highlight relevant experience, educational background, and specific responsibilities within the firm. The document would showcase their collective expertise, demonstrating Rosenbaum Pearl’s capacity to handle complex transactions. It would also emphasize their commitment to client success and industry leadership.

VII. Competitive Landscape

A Rosenbaum Pearl Investment Banking PDF analysis of the competitive landscape would position the firm against both larger investment banks and specialized boutiques. While giants offer broader resources, Rosenbaum Pearl differentiates itself through a niche focus and personalized service.

The PDF would highlight the firm’s agility and deep industry expertise, particularly in sectors like healthcare, technology, and consumer products. It would emphasize the benefits of working with a team possessing both financial prowess and a unique perspective – informed by backgrounds extending beyond traditional finance, like Michael Rosenbaum’s diverse career.

VII.A. Comparison with Larger Investment Banks

A Rosenbaum Pearl Investment Banking PDF comparing the firm to larger institutions would detail key distinctions. Major banks boast extensive global reach and broader product offerings, but often lack the focused attention Rosenbaum Pearl provides. The PDF would illustrate how larger firms may serve numerous clients simultaneously, potentially diluting personalized service.

Rosenbaum Pearl’s agility and specialized industry knowledge—detailed within the PDF—offer a competitive advantage. The document would emphasize the firm’s ability to navigate complex transactions with a dedicated team, contrasting this with the hierarchical structures of larger banks.

VII.B. Niche Focus & Differentiation

A Rosenbaum Pearl Investment Banking PDF would highlight the firm’s strategic differentiation through specialized industry focus. Unlike broad-based investment banks, Rosenbaum Pearl concentrates on sectors like healthcare, technology, and consumer products, as detailed in their materials. This targeted approach allows for deeper industry expertise and a stronger network of contacts.

The PDF would showcase how this niche focus, combined with the founder’s diverse background—from entertainment to legal recognition—provides a unique perspective. This contrasts with larger firms, potentially offering clients more tailored advice and superior transaction outcomes, as documented in case studies within the PDF.

VIII. Recent Notable Transactions

A Rosenbaum Pearl Investment Banking PDF would detail recent transactions demonstrating the firm’s capabilities. Expect case studies, such as a healthcare M&A deal and a technology private placement, showcasing successful outcomes. These examples would illustrate their expertise in navigating complex financial landscapes.

The PDF would likely emphasize the firm’s ability to deliver value to clients, potentially referencing the founder’s experience and legal accolades. Details on deal size, structure, and client testimonials would be included. Furthermore, the document could highlight their real estate investment services, if applicable, demonstrating a diversified portfolio of successful transactions.

VIII.A. Case Study 1: Healthcare M&A Deal

A Rosenbaum Pearl Investment Banking PDF case study on a healthcare M&A deal would detail a strategic acquisition. It would outline the client – a potentially mid-sized healthcare provider – and the acquiring entity. The PDF would analyze the valuation methodology employed, highlighting Rosenbaum Pearl’s financial modeling expertise;

Key transaction details, including deal size and structure, would be presented. The document would emphasize how Rosenbaum Pearl navigated regulatory hurdles and facilitated a smooth closing. It would also showcase the firm’s understanding of the healthcare industry, potentially referencing the founder’s diverse background and legal recognition.

VIII.B. Case Study 2: Technology Private Placement

A Rosenbaum Pearl Investment Banking PDF detailing a technology private placement would showcase their capital-raising capabilities. The document would profile a growth-stage tech company seeking funding, outlining their innovative solution and market opportunity. It would detail the investor base secured by Rosenbaum Pearl, potentially including venture capital firms or private equity groups.

The PDF would analyze the terms of the private placement – valuation, equity stake, and investor rights. It would highlight Rosenbaum Pearl’s ability to structure a deal favorable to both the company and investors, leveraging their financial acumen and industry connections. The founder’s background might be subtly referenced as building trust.

IX. Regulatory Compliance & Legal Considerations

A Rosenbaum Pearl Investment Banking PDF concerning regulatory compliance would detail their adherence to SEC regulations and FINRA guidelines. It would emphasize their commitment to transparency and ethical conduct in all transactions, crucial for investor confidence. The document would outline due diligence processes, ensuring full disclosure and mitigating legal risks.

Given Michael Rosenbaum’s legal recognition (Florida Legal Elite, Super Lawyer), the PDF could subtly highlight the firm’s internal legal expertise. It would cover compliance with anti-money laundering (AML) regulations and know-your-customer (KYC) protocols, demonstrating a robust risk management framework. This builds trust and assures clients of responsible practices.

X. Rosenbaum Pearl’s Approach to Client Relationships

A Rosenbaum Pearl Investment Banking PDF outlining their client approach would emphasize personalized service, mirroring the “hassle-free” real estate investment philosophy mentioned elsewhere. It would detail a commitment to understanding each client’s unique financial goals and risk tolerance. The document would showcase a collaborative process, fostering long-term partnerships built on trust and open communication.

Drawing on Michael Rosenbaum’s background in entertainment – known for connecting with audiences – the PDF might subtly suggest a client-centric approach. It would highlight responsiveness, proactive communication, and a dedication to exceeding expectations, ultimately building lasting relationships.

XI. Fee Structure & Cost Considerations

A comprehensive Rosenbaum Pearl Investment Banking PDF detailing fee structures would likely outline a tiered approach, potentially including retainer fees, success fees, and expense reimbursements. Transparency is key; the document would clearly articulate all potential costs associated with each service – M&A advisory, private placements, or restructuring.

Considering Michael Rosenbaum’s diverse background, the PDF might emphasize value delivered relative to cost. It would likely detail how Rosenbaum Pearl’s expertise maximizes returns for clients, justifying their fees. The document would also address potential cost savings achieved through efficient deal execution and strategic financial planning.

XII. The “Smallville” Connection ౼ Michael Rosenbaum’s Background

While seemingly disparate, Michael Rosenbaum’s acting career, notably his role as Lex Luthor in “Smallville,” informs his approach to Rosenbaum Pearl Investment Banking. A PDF profile might highlight the analytical skills honed through character development and negotiation – skills transferable to complex financial deals.

His public persona, described as someone “you might not know by name, but recognize the face,” suggests a focus on building trust and rapport. This translates to client relationships. The PDF could subtly position this background as a unique asset, demonstrating adaptability and a nuanced understanding of people.

XIII. Rosenbaum as a Surname ⎻ Historical Context

The surname “Rosenbaum,” meaning “rose tree” in German, carries a rich history, often linked to Ashkenazi Jewish heritage, though also found among non-Jewish Germans. A Rosenbaum Pearl Investment Banking PDF document could subtly leverage this heritage, implying a legacy of resilience and long-term vision.

The name’s origins, tied to a natural, enduring image, might be presented as symbolic of the firm’s commitment to sustainable growth for its clients. This historical context, while not directly financial, adds depth and a sense of established roots, potentially included in a firm overview PDF.

XIV. Rosenbaum Funeral Home ⎻ Distinguishing from Investment Banking

A crucial element within any Rosenbaum Pearl Investment Banking PDF material is a clear distinction from the unrelated Rosenbaum Funeral Home in Gibson City, IL. The potential for brand confusion necessitates a dedicated section, or at least a footnote, explicitly stating the firm’s focus on financial services.

This clarification is vital for maintaining professional credibility and avoiding misdirected inquiries. The PDF should emphasize the firm’s expertise in M&A, private placements, and restructuring, firmly separating it from the sensitive and entirely different services offered by the funeral home.

XV. The Rosenbaum Hotel ⎻ Another Business Entity

Any comprehensive Rosenbaum Pearl Investment Banking PDF document must address the existence of The Rosenbaum Hotel, located in Baltimore’s historic district. This is essential to preemptively dispel any potential association or confusion among investors and clients.

The PDF should clearly state that Rosenbaum Pearl has no affiliation with the hotel’s operations or ownership. A brief disclaimer outlining the firm’s exclusive focus on investment banking services—M&A advisory, capital raising, and financial restructuring—reinforces this separation. Transparency builds trust and avoids unnecessary due diligence questions.

XVI. Ben Rosenbaum ౼ Hallmark Channel Actor (Separate Individual)

A thorough Rosenbaum Pearl Investment Banking PDF profile must explicitly differentiate the firm from Ben Rosenbaum, the Hallmark Channel actor known for roles like “The Christmas Cup.” This preemptive clarification is crucial for brand identity and investor confidence.

The PDF should include a concise statement confirming Ben Rosenbaum has no connection to Rosenbaum Pearl’s operations, leadership, or investment strategies. Highlighting Michael Owen Rosenbaum’s background—specifically his prior work in film and television—and then firmly establishing his distinct role within the investment bank is vital. Avoiding ambiguity is paramount.

XVII. Real Estate Investment Services (Potential Affiliation)

A comprehensive Rosenbaum Pearl Investment Banking PDF document should address any perceived affiliation with real estate investment services. Information indicates a focus on “hassle-free” real estate investing, necessitating a clear delineation within the firm’s profile.

The PDF must specify whether Rosenbaum Pearl offers direct real estate investment banking services – such as REIT advisory or property M&A – or if this represents a separate, potentially affiliated entity. Transparency regarding any related ventures is crucial for regulatory compliance and investor understanding. Clearly stating the scope of services avoids potential conflicts of interest.

XVIII. Rosenbaum Pearl’s Geographic Reach

A detailed Rosenbaum Pearl Investment Banking PDF profile should explicitly outline the firm’s geographic focus. While current information doesn’t specify a primary location, detailing service areas is vital. Does the firm concentrate on regional deals, national transactions, or international opportunities?

The PDF should clarify if Rosenbaum Pearl maintains offices in multiple locations, or operates primarily through a centralized hub. Mentioning any specific state or regional expertise – like Florida, given legal recognitions – enhances credibility. Defining geographic reach assures clients of the firm’s capacity to handle deals within their desired markets.

XIX. Technology Utilized in Investment Banking Processes

A comprehensive Rosenbaum Pearl Investment Banking PDF document should detail the technology stack employed. Modern investment banking relies heavily on sophisticated tools for valuation, financial modeling, and data analysis. Does the firm utilize Bloomberg Terminal, FactSet, or other industry-standard platforms?

The PDF should also address data security protocols and compliance measures. Mentioning CRM systems for client relationship management and deal tracking software demonstrates operational efficiency. Furthermore, outlining the use of secure document sharing platforms is crucial. Transparency regarding technological capabilities builds client trust and showcases a commitment to innovation.

XX. Future Outlook & Growth Strategy

A detailed Rosenbaum Pearl Investment Banking PDF outlining future plans is essential. Given Michael Rosenbaum’s diverse background – from acting to legal recognition – expansion into new sectors is plausible. The firm’s potential real estate affiliation suggests diversification as a key strategy.

The PDF should articulate plans for geographic expansion, potentially beyond its current reach. Investment in technology, as previously discussed, will be crucial for scalability. Attracting and retaining top talent, alongside strengthening client relationships, are vital components. Ultimately, the document should convey a clear vision for sustained growth and market leadership.

XXI. Accessing Rosenbaum Pearl Resources (PDF Documents)

Rosenbaum Pearl Investment Banking provides comprehensive resources, primarily through downloadable PDF documents. These include detailed firm overviews, industry reports, and transaction summaries. Access is typically granted via the company website’s “Resources” or “Insights” section, requiring a simple registration process.

Specific PDFs may cover their deal process, service offerings, and key personnel profiles. Given Michael Rosenbaum’s background, expect materials showcasing a unique perspective. Clients and prospective investors can request tailored PDF reports detailing specific investment opportunities or market analyses. Secure access and confidentiality are prioritized in document distribution.

XXII. Client Testimonials & Success Stories

Rosenbaum Pearl Investment Banking showcases client successes through detailed case studies, often available as downloadable PDF documents. These narratives highlight successful M&A deals, private placements, and restructuring engagements. Testimonials emphasize the firm’s personalized approach and industry expertise, potentially referencing Michael Rosenbaum’s unique background.

PDF reports detail transaction specifics, challenges overcome, and quantifiable results achieved for clients. Success stories span healthcare, technology, and consumer sectors. Access to these materials demonstrates Rosenbaum Pearl’s commitment to transparency and building trust. Positive client feedback consistently highlights their proactive communication and strategic guidance.

XXIII. Contact Information & Location Details

Rosenbaum Pearl Investment Banking’s comprehensive contact details, including phone numbers, email addresses, and physical location information, are readily accessible. A dedicated “Contact Us” section on their website likely features a downloadable PDF brochure with this information. While a specific address isn’t provided in current data, the firm’s presence is established.

Potential inquiries regarding real estate investment services or access to detailed transaction reports in PDF format can be directed through these channels. Given Michael Rosenbaum’s diverse background, inquiries may also be routed through associated entities. Further details are available upon request, ensuring client accessibility.

XXIV. Frequently Asked Questions (FAQ)

Q: Does Rosenbaum Pearl offer detailed transaction reports? A: Yes, comprehensive deal summaries and analyses are often available in PDF format upon request, outlining key financial metrics and strategic insights.

Q: Is Michael Rosenbaum involved in the investment banking operations? A: While known for his entertainment career, his involvement and expertise contribute to the firm’s unique perspective. Further details may be found in a firm overview PDF.

Q: Are there resources available for potential investors? A: Absolutely, introductory materials and investment prospectuses are frequently provided as downloadable PDF documents on the company website.

Categories
PDF

harry potter 4th book pdf

Harry Potter and the Goblet of Fire PDF: A Comprehensive Guide (Updated 12/09/2025)

Discover convenient access to the fourth installment! Explore free eBook options via OverDrive and Hoopla, alongside downloadable PDF formats, ensuring a magical reading experience.

Availability of the eBook

Finding the “Harry Potter and the Goblet of Fire” eBook is remarkably accessible today. Numerous platforms offer digital versions for your reading pleasure. OverDrive stands out, allowing free access to eBooks, audiobooks, and even movies directly through your local library – a fantastic, legal avenue!

Alternatively, the Hoopla Digital platform provides another excellent option. Download the entire Harry Potter series, including this fourth book, with no waiting periods using the Hoopla app. Notably, Hoopla boasts availability in multiple languages, such as Spanish, French, and German, catering to a diverse readership.

The Internet Archive also offers borrowing and streaming options. These resources ensure a convenient and legal way to enjoy J.K. Rowling’s captivating story in PDF format.

OverDrive and Library Access

OverDrive provides a seamless and legal pathway to access the “Harry Potter and the Goblet of Fire” eBook through your local library. This platform partners with libraries worldwide, offering a vast digital collection. Simply use your library card to borrow the eBook, eliminating purchase costs.

The convenience is unparalleled; read on your preferred device – tablet, smartphone, or computer. OverDrive supports various formats, ensuring compatibility. Borrowing periods are typically customizable, allowing ample time to immerse yourself in the story.

It’s a fantastic resource for students, avid readers, and anyone seeking affordable access to this beloved novel. Explore your library’s OverDrive catalog today and begin your magical journey!

Hoopla Digital Platform

Hoopla offers instant access to “Harry Potter and the Goblet of Fire” in digital format, utilizing your public library card. Unlike traditional library loans, Hoopla boasts no waiting lists – download and start reading immediately! The platform provides eBooks, audiobooks, movies, and more, all within a single, user-friendly interface.

Access is available on various devices, including smartphones, tablets, and computers. Hoopla is particularly advantageous for those seeking immediate gratification and a diverse range of digital content. Furthermore, the platform supports simultaneous borrowing, meaning multiple users can access the same title concurrently.

Notably, Hoopla offers the entire Harry Potter series in multiple languages, including Spanish, French, and German, enhancing accessibility for a wider audience.

“Harry Potter and the Goblet of Fire” plunges readers into a year of thrilling challenges and escalating danger. The story centers around the Triwizard Tournament, a competition between Hogwarts, Beauxbatons, and Durmstrang magical schools. Despite being underage, Harry is inexplicably chosen as a fourth champion, thrusting him into life-threatening tasks involving dragons, the Black Lake, and a treacherous maze.

Alongside the tournament, a sinister undercurrent emerges, signaling Lord Voldemort’s growing power. The novel details Harry’s struggles with the tournament’s demands, his friendships with Ron and Hermione, and the looming threat of the Dark Lord’s return. It’s a 636-page adventure filled with magical duels, political intrigue, and a darkening tone.

The Triwizard Tournament

The Triwizard Tournament is a prestigious event, revived in Harry Potter and the Goblet of Fire, pitting champions from three major European magical schools – Hogwarts, Beauxbatons, and Durmstrang – against each other in a series of perilous trials. These tasks are designed to test magical ability, courage, and intelligence. The tournament’s selection process involves the Goblet of Fire, an enchanted object that impartially chooses the champions.

However, the tournament takes an unexpected turn when Harry Potter’s name emerges from the Goblet, despite his age disqualifying him. This forces him to compete, facing challenges like battling a dragon, retrieving a golden egg from the Black Lake, and navigating a deadly maze, all while contending with a growing sense of danger and intrigue.

Harry’s Unexpected Entry

Despite being underage and therefore ineligible, Harry Potter is shockingly selected as a fourth champion in the Triwizard Tournament. The Goblet of Fire, a magical artifact meant to ensure fairness, inexplicably chooses his name, throwing Hogwarts into chaos and raising suspicions of foul play. This unexpected entry thrusts Harry into a dangerous competition he never volunteered for.

Many question how Harry’s name was entered, suspecting someone deliberately manipulated the Goblet. He is forced to confront the challenges alongside the chosen champions, facing immense pressure and scrutiny. His participation is not merely a test of skill, but a deliberate attempt to draw him into a larger, darker scheme orchestrated by Lord Voldemort’s growing power.

Rising Threat of Voldemort

Throughout “Harry Potter and the Goblet of Fire,” a palpable sense of dread accompanies the escalating signs of Lord Voldemort’s return. The tournament serves as a carefully constructed stage for his resurgence, with subtle manipulations and ominous events foreshadowing his full power. Dark magic is increasingly prevalent, and unsettling occurrences hint at a growing unrest within the wizarding world.

The climax reveals Voldemort’s physical restoration, achieved through a dark ritual involving Harry’s blood and the assistance of Peter Pettigrew. This terrifying event marks a turning point in the series, shifting the narrative from a childhood adventure to a desperate battle against a formidable enemy. The book’s conclusion leaves no doubt: the war has begun, and the stakes are higher than ever before.

Key Characters and Their Roles

Within “Harry Potter and the Goblet of Fire,” characters face pivotal moments defining their growth and allegiances. Harry, thrust into the Triwizard Tournament, demonstrates courage and resilience while grappling with the weight of prophecy. Ron and Hermione provide unwavering support, navigating their own insecurities and contributing crucial intelligence.

Draco Malfoy embodies antagonistic cunning, fueled by prejudice and ambition, consistently undermining Harry’s efforts. Other key figures, like Albus Dumbledore and Severus Snape, operate with complex motivations, their roles shrouded in mystery. The tournament participants – Cedric Diggory, Fleur Delacour, and Viktor Krum – showcase diverse magical skills and personalities, adding depth to the narrative’s competitive landscape.

Harry Potter’s Challenges

Harry faces extraordinary trials in “The Goblet of Fire,” beginning with the shocking selection for the Triwizard Tournament. Despite being underage, he’s compelled to compete against seasoned wizards, navigating perilous tasks demanding skill and bravery. The first task pits him against a dragon, testing his flying and spellcasting abilities.

The second task requires him to rescue hostages from the Black Lake, showcasing his underwater prowess and quick thinking. Beyond the tournament, Harry grapples with disturbing visions and the resurfacing threat of Lord Voldemort, adding emotional and psychological burdens. His journey is marked by danger, loss, and the growing realization of his destiny.

Ron Weasley and Hermione Granger’s Support

Throughout the trials of the Triwizard Tournament, Ron and Hermione remain steadfast allies to Harry. Ron provides unwavering loyalty and comedic relief, helping Harry navigate the social complexities and anxieties surrounding the competition. Hermione, with her exceptional intellect, offers crucial research and strategic advice, assisting Harry in preparing for each daunting task.

Their support extends beyond practical assistance; they offer emotional strength during a time of immense pressure and fear. Despite moments of jealousy and disagreement, their friendship endures, proving vital to Harry’s survival and success. They exemplify the power of friendship in the face of adversity, a central theme within the novel;

The Role of Draco Malfoy

Draco Malfoy consistently embodies antagonism throughout “Harry Potter and the Goblet of Fire,” serving as a persistent source of conflict for Harry. He revels in Harry’s misfortune, particularly his unexpected entry into the Triwizard Tournament, and actively attempts to undermine him through taunts and schemes.

Malfoy’s behavior hints at a deeper connection to the rising darkness, subtly foreshadowing his family’s allegiance to Voldemort. His actions, though seemingly petty, contribute to the growing tension and sense of unease permeating Hogwarts. The phrase “Draco Dormiens Nunquam Titillandus” – never tickle a sleeping dragon – subtly alludes to his potential for dangerous escalation. He represents the insidious nature of prejudice and the allure of dark magic.

Detailed Plot Points

“Harry Potter and the Goblet of Fire” unfolds with a thrilling sequence of events. The story begins with the exciting Quidditch World Cup, abruptly disrupted by a terrifying attack by Death Eaters, signaling Voldemort’s growing power. This is followed by the introduction of the Triwizard Tournament, a challenging competition between Hogwarts, Beauxbatons, and Durmstrang.

Harry’s unexpected selection as a fourth champion throws the tournament into chaos, forcing him to confront perilous tasks – battling dragons, rescuing hostages from the Black Lake, and navigating a deadly maze. These trials test his magical abilities, courage, and friendships, all while a sinister plot orchestrated by Voldemort unfolds in the background, culminating in a tragic showdown.

The Quidditch World Cup Incident

The novel dramatically opens with the Quidditch World Cup, a spectacle of international wizarding sport. However, the joyous atmosphere is shattered by a brutal attack orchestrated by Lord Voldemort’s followers, the Death Eaters. This incident serves as a chilling premonition of the darkness to come, marking a significant escalation in Voldemort’s return to power.

The attack involves the creation of the Dark Mark, a terrifying symbol of Voldemort’s reign, in the sky above the campsite. This act instills fear and panic among the wizarding community, demonstrating Voldemort’s growing influence and willingness to openly challenge the Ministry of Magic. The event foreshadows the dangers Harry will face throughout the Triwizard Tournament.

The First Task: Dragons

The inaugural challenge of the Triwizard Tournament throws Harry, Cedric Diggory, Fleur Delacour, and Viktor Krum into a terrifying confrontation with dragons. Each champion must retrieve a golden egg guarded by a different dragon species – Hungarian Horntail, Swedish Short-Snout, Welsh Green, and Chinese Fireball. This task tests not only their magical prowess but also their courage, quick-thinking, and strategic abilities.

Harry cleverly utilizes his knowledge of flying and a Summoning Charm to call for his Firebolt, engaging in a daring aerial duel with the Hungarian Horntail. His successful retrieval of the golden egg, despite the immense danger, showcases his exceptional flying skills and bravery, earning him significant points and admiration.

The Second Task: The Black Lake

The second trial plunges the champions into the depths of the Black Lake, a murky and dangerous environment teeming with magical creatures. Their objective: rescue hostages taken by the merpeople. However, the lake is guarded by Grindylows and a colossal Giant Squid, presenting formidable obstacles.

Harry, utilizing a Gillyweed potion granted by Dobby, gains the ability to breathe underwater, allowing him to navigate the lake effectively. He encounters the merpeople, negotiates their release of Ron (his hostage), and successfully retrieves him, demonstrating his compassion and resourcefulness. This task highlights Harry’s ability to think under pressure and his unwavering loyalty to his friends.

Accessing the PDF Format

Readers seeking the “Harry Potter and the Goblet of Fire” in PDF format have several avenues available. The Internet Archive offers free download, borrowing, and streaming options, providing convenient access to the eBook. Alternatively, platforms like Hoopla Digital allow users to download the complete Harry Potter series, including this fourth installment, directly to their devices—often without wait times!

Furthermore, the book is available as a downloadable PDF or Word document from various online sources. However, it’s crucial to ensure any downloads originate from legal and reputable websites to avoid copyright infringement and potential malware. Always prioritize legitimate platforms for a safe and enjoyable reading experience.

Free Download Options

Numerous online resources offer “Harry Potter and the Goblet of Fire” as a free PDF download, but caution is advised. The Internet Archive stands out as a legitimate platform for borrowing and streaming the eBook without cost. Additionally, some libraries utilize OverDrive and Hoopla, granting free access to the digital book with a library card.

However, be wary of unofficial websites promising free downloads, as these may contain viruses or infringe on copyright. Prioritize reputable sources to ensure a safe and legal reading experience. Exploring library digital collections and the Internet Archive are excellent starting points for accessing the PDF version at no charge.

Legal Considerations for Downloading

Downloading copyrighted material like “Harry Potter and the Goblet of Fire” without authorization is illegal. Respecting copyright laws is crucial; unauthorized downloads constitute a violation and can lead to legal consequences. Opting for legitimate sources, such as OverDrive, Hoopla, or the Internet Archive, ensures compliance with copyright regulations.

These platforms offer access through licensing agreements with publishers, providing a legal pathway to enjoy the eBook. Avoid websites offering free downloads from unofficial sources, as they often operate illegally and may expose you to risks. Supporting authors and publishers by utilizing legal avenues protects intellectual property rights and fosters a sustainable literary ecosystem.

Language Availability

Readers seeking “Harry Potter and the Goblet of Fire” in languages other than English are in luck! Numerous translations are readily available, expanding the book’s reach to a global audience. Hoopla, in particular, boasts versions in Spanish, French, and German, offering excellent language practice opportunities.

This accessibility caters to diverse readers and supports language learning initiatives. Beyond these common languages, other translations may be found through various eBook retailers and library systems. Exploring these options allows fans worldwide to immerse themselves in Harry’s fourth year at Hogwarts in their preferred language, fostering a truly inclusive reading experience.

Translations: Spanish, French, German & More

Delve into the magical world of Hogwarts in your native tongue! “Harry Potter and the Goblet of Fire” has been expertly translated into a multitude of languages, ensuring a wider readership. Specifically, Hoopla Digital provides convenient access to versions in Spanish, French, and German, perfect for language learners or those preferring to read in their mother tongue.

Beyond these prominent translations, dedicated fans can often locate the book in additional languages through various online retailers and library networks. This broad availability demonstrates the enduring global appeal of J.K. Rowling’s series, allowing readers everywhere to experience the adventure.

The Significance of the Fourth Book

“Harry Potter and the Goblet of Fire” marks a pivotal shift in the series, transitioning from childhood wonder to a darker, more complex narrative. Character development reaches new depths as Harry, Ron, and Hermione grapple with mature themes and increasing danger. The book’s darkening tone foreshadows the escalating conflict with Voldemort, preparing readers for the challenges ahead.

Crucially, this installment introduces key plot elements that become central to the series’ conclusion. The re-emergence of Voldemort, the exploration of magical politics, and the introduction of new characters all lay the groundwork for future conflicts. Reading the PDF version allows for easy reference and revisiting of these crucial moments.

Character Development

Within the pages of the “Goblet of Fire” PDF, we witness significant growth in our core trio; Harry confronts immense pressure and loss, forced to mature rapidly under the weight of the Triwizard Tournament and Voldemort’s return. Ron navigates jealousy and insecurity, ultimately proving his loyalty and courage. Hermione demonstrates her intellectual prowess and unwavering support, becoming an indispensable ally.

Furthermore, secondary characters like Draco Malfoy are fleshed out, revealing motivations beyond simple antagonism. The PDF format allows for close examination of dialogue and interactions, highlighting the nuances of each character’s evolution. This book showcases how adversity shapes individuals, preparing them for the battles to come.

Darkening Tone of the Series

The “Goblet of Fire” PDF marks a pivotal shift in the Harry Potter series, abandoning much of the childhood innocence of earlier books. This installment introduces a palpable sense of dread and loss, foreshadowing the escalating conflict with Voldemort. The Triwizard Tournament, while exciting, is fraught with danger and ultimately serves as a prelude to darker times.

Reading the PDF reveals a more mature and complex narrative, exploring themes of death, betrayal, and the corrupting influence of power. The return of Voldemort isn’t merely a plot point; it’s a chilling realization of the looming threat. This tonal shift prepares readers for the increasingly grim realities of the wizarding world.

The “Goblet of Fire” PDF isn’t just a standalone story; it lays crucial groundwork for the series’ climax. Within its pages, the PDF introduces vital plot elements that become central to the subsequent books. Specifically, the resurgence of Voldemort and the exploration of his past are significantly developed, shaping the overarching narrative.

Furthermore, the PDF establishes the importance of Horcruxes, a concept that drives much of the conflict in the later installments. The introduction of Barty Crouch Jr., disguised as Mad-Eye Moody, highlights the dangers of deception and the infiltration of Death Eaters. Downloading the PDF offers insight into these foundational elements, enriching the understanding of the entire saga.

Categories
Tutorials

cheer bow tutorial

Cheer Bow Tutorial: A Comprehensive Guide

Dive into the vibrant world of cheer bows! This guide unveils techniques – from hand-tying to utilizing tools like Bowdabra and Cricut –
for crafting stunning, personalized bows, perfect for spirited celebrations and team pride.

Learn to add dazzling glitter, secure embellishments, and safely attach bows to headbands or clips, ensuring durability and a polished finish.

Cheer bows are more than just accessories; they’re symbols of spirit, teamwork, and dedication! These brightly colored creations are a staple in cheerleading, dance, and school events, instantly adding energy and flair.
From simple designs to elaborate, customized creations, cheer bows allow individuals to express their personality and support their teams.

Historically, bows evolved from practical hair ties to elaborate statements, reflecting evolving trends and the desire for eye-catching displays. Today, they’re a beloved craft, offering endless possibilities for creativity and personalization.

Materials Needed for Cheer Bow Making

Gathering the right supplies is key to successful bow creation! You’ll need a variety of ribbons – satin, grosgrain, or holographic – in your desired colors. Essential tools include sharp scissors, a ruler, and strong thread or embroidery floss.

For added sparkle, stock up on glitter and adhesives. A Bowdabra or Cricut machine (optional) can streamline the process. Don’t forget headbands, hair clips, and embellishments like rhinestones and charms!

Choosing the Right Ribbon

Ribbon selection dramatically impacts your bow’s final look! Consider the desired texture and sheen. Satin offers a luxurious, smooth finish, while grosgrain provides a more textured, durable option. Holographic ribbon adds a dazzling, eye-catching effect.

Ribbon width is also crucial; wider ribbons create fuller bows, while narrower ones are ideal for delicate designs. Experiment to find what best suits your project!

Ribbon Types: Satin, Grosgrain, and Holographic

Satin ribbon boasts a sleek, glossy surface, perfect for elegant bows, but can be slippery. Grosgrain ribbon, with its ribbed texture, offers greater grip and durability, making it ideal for high-energy cheerleading.

Holographic ribbon delivers a mesmerizing, iridescent shine, adding a unique, modern touch. Each type presents distinct advantages, influencing the bow’s structure and overall aesthetic.

Ribbon Widths and Their Uses

Ribbon width significantly impacts the final bow’s size and fullness. Wider ribbons (3-4 inches) create voluminous, statement bows, excellent for showcasing team colors. Narrower ribbons (1.5-2 inches) are suited for smaller, more delicate accents or layered details.

Experimenting with varying widths adds visual interest and allows for customized designs, catering to diverse preferences and cheerleading styles.

Basic Cheer Bow Construction: The Hand-Tied Method

Mastering the hand-tied method is fundamental to cheer bow creation. Begin by forming even loops, ensuring symmetry for a polished look. Secure the center pinch tightly, as this forms the bow’s core. Wrap thread multiple times around the center, then tie a secure knot in the back.

Practice makes perfect – this technique requires patience, but yields beautifully crafted bows!

Creating the Loops

Loop creation is the cornerstone of a beautiful cheer bow. Start by pinching the ribbon at the center, forming the first loop. Repeat this process to create a second loop, mirroring the first in size and shape. Double-check for evenness on both sides of the center pinch.

Consistent loop size is key to a balanced, professional-looking finished product, so take your time and adjust as needed!

Securing the Center Pinch

Once loops are formed, securing the center pinch is crucial. Wrap thread tightly several times around the bow’s center, cinching the loops together. This prevents unraveling and maintains the bow’s shape. Tie a secure knot in the back to further reinforce the pinch.

A tightly secured center ensures a long-lasting, polished cheer bow that will withstand enthusiastic use and maintain its vibrant appearance.

Adding the Knot and Tying it Off

After wrapping the center, create a knot for lasting security. Insert loose wires through the loop and pull tightly while the bow remains in the Bowdabra, or your hands. Tie a double knot to prevent loosening during wear and tear.

This final step solidifies the bow’s structure, ensuring it stays beautifully formed through countless cheers and performances, offering peace of mind.

Using a Bowdabra for Faster Bow Making

The Bowdabra streamlines cheer bow creation! Begin with proper Bowdabra setup and strategic ribbon placement. This tool simplifies loop formation, drastically reducing crafting time. Create stunning bows with ease, even for complex designs.

Secure and finish your Bowdabra-made bow by tying off the center, ensuring a professional look. It’s a game-changer for efficiency!

Bowdabra Setup and Ribbon Placement

Proper setup is key to Bowdabra success! Securely position the Bowdabra on a stable surface. Next, feed the ribbon through the tower, leaving sufficient tail length for tying. Center the ribbon, ensuring even distribution on both sides for symmetrical loops;

Maintain tension while creating loops; this ensures a crisp, well-defined bow. Experiment with ribbon lengths to achieve desired fullness.

Creating the Bow with the Bowdabra Tool

Now, let the Bowdabra work its magic! Holding the ribbon ends, gently push and fold to create desired loop sizes. Continue forming loops until you achieve the desired bow volume and shape. The Bowdabra holds the loops securely, simplifying the process.

Maintain even pressure for consistent loop formation, resulting in a beautifully balanced cheer bow.

Securing and Finishing the Bowdabra-Made Bow

Time to secure your masterpiece! Insert the loose wires through the loop and pull tightly while the bow remains within the Bowdabra. This cinches the center, creating a defined pinch. Remove the bow, separate the ends, and turn it to the back.

Tie a secure knot – a double knot is recommended – for lasting durability. This completes the Bowdabra-made bow, ready for embellishment!

Customizing Your Cheer Bows with a Cricut

Unleash your creativity with a Cricut! Discover how to personalize cheer bows using your Cricut machine, adding unique flair to every creation. Design captivating elements within Cricut Design Space, tailoring bows to any team or occasion.

Cut heat transfer vinyl for custom bow tails, then expertly apply the vinyl to ribbon, showcasing mascots, names, or inspiring phrases.

Designing Bow Elements with Cricut Design Space

Begin your customization journey in Cricut Design Space! This powerful software allows you to conceptualize and create intricate designs for your cheer bows. Import images, utilize pre-designed elements, or craft original artwork to perfectly match your team’s spirit.

Experiment with fonts, sizes, and colors, ensuring your designs are visually striking and ready for cutting. Prepare your files for heat transfer vinyl or other materials.

Cutting Heat Transfer Vinyl for Bow Tails

Precision is key when cutting heat transfer vinyl (HTV) for bow tails! Mirror your design in Cricut Design Space before cutting to ensure proper application. Select the appropriate material setting on your Cricut machine – typically “Iron-On.”

Carefully weed away the excess vinyl, leaving only your desired design on the carrier sheet. This prepares the HTV for a flawless transfer to your ribbon tails, adding a personalized touch.

Applying Vinyl to Ribbon Tails

Heat application is crucial for adhering vinyl to ribbon tails! Place the weeded HTV design onto the ribbon, carrier sheet side up. Use a heat press or household iron (temperature setting for cotton) to apply firm, even pressure for the recommended time.

Carefully peel away the carrier sheet while the vinyl is still warm, revealing your beautifully customized bow tails. Ensure a secure bond for lasting wear.

Adding Glitter and Embellishments

Transform your cheer bows with sparkle and flair! Choose from fine, chunky, or holographic glitter for desired effect. Apply adhesive securely, then generously coat with glitter, pressing firmly.
Remove excess for a clean finish.

Elevate designs with rhinestones, charms, or ribbons, using strong glue or stitching for lasting attachment. Let your creativity shine!

Types of Glitter for Cheer Bows

Select glitter that matches your team’s spirit! Fine glitter offers a subtle shimmer, ideal for delicate designs. Chunky glitter provides bold sparkle, perfect for eye-catching bows.
Holographic glitter creates a mesmerizing, color-shifting effect.

Consider polyester glitter for durability and minimal shedding, ensuring your bows remain dazzling through every cheer and performance.

Applying Glitter Securely

A strong adhesive is key to glitter success! Apply a thin, even coat of glitter glue or Mod Podge to the desired areas of your bow.
Generously sprinkle glitter over the adhesive, then gently press it in for maximum coverage.

Allow the glue to dry completely before shaking off excess glitter, preventing shedding and ensuring a long-lasting, sparkling finish.

Adding Rhinestones, Charms, and Other Decorations

Elevate your cheer bows with dazzling details! Use a strong craft glue to adhere rhinestones, charms, or other embellishments to your bow.
Consider the placement for visual balance and a cohesive design.

Allow the glue to dry completely before handling, ensuring a secure hold. Experiment with different combinations to create unique, eye-catching bows!

Attaching the Bow to a Headband or Hair Clip

Securely fasten your masterpiece! Choose a headband or clip that complements the bow’s size and style. For a lasting bond, use a robust craft glue, applying it generously to the bow’s base.

Alternatively, stitching provides extra security, especially for heavier embellishments. Ensure a firm attachment to prevent accidental detachment and potential hazards during spirited activities.

Choosing the Right Headband or Clip

Selecting the perfect base is crucial! Consider the bow’s size and weight; larger, heavier bows require sturdier headbands or clips. Opt for comfortable materials like grosgrain-covered plastic or soft, flexible headbands.

Color coordination is key – match the base to the bow’s colors or team palette. Ensure the clip has a strong grip to prevent slipping during energetic routines and performances.

Securing the Bow: Glue vs. Stitching

Attachment method impacts durability! Hot glue offers a quick, strong bond, ideal for embellishments and faster projects, but may weaken over time with vigorous use.

Stitching provides a more secure, long-lasting hold, especially for heavier bows. Use a strong thread and reinforce the stitches for maximum stability. Consider the headband material when choosing your method.

Creating Different Bow Styles

Expand your bow artistry! Single loop bows are classic and simple, perfect for beginners. Double loop bows add volume and visual interest, while triple loop bows create a dramatic, show-stopping effect.

Experiment with loop size and ribbon layering to achieve unique textures and designs. Mastering these styles unlocks endless customization possibilities for spirited cheer bows!

Single Loop Bows

The foundation of cheer bow making! Single loop bows are incredibly versatile and easy to create, making them ideal for beginners. Form one continuous loop with your ribbon, ensuring a balanced shape.

Secure the center pinch tightly with thread or wire, and finish with a knot. These bows are perfect for minimalist designs or as a base for adding embellishments and layers.

Double Loop Bows

Adding fullness and dimension! Double loop bows build upon the single loop technique, creating a more substantial and eye-catching design. Form two symmetrical loops, carefully layering them on top of each other.

Secure the center pinch firmly, ensuring both loops are evenly balanced. This style offers a classic look and provides a great canvas for showcasing team colors and glitter!

Triple Loop Bows and Beyond

For maximum impact and flair! Triple loop bows take the double loop concept further, adding even more volume and visual interest. Mastering this technique requires patience and precise loop creation.

Experiment with varying loop sizes and ribbon widths to achieve unique effects. Don’t be afraid to explore beyond three loops – create extravagant bows that truly stand out!

Troubleshooting Common Cheer Bow Problems

Don’t let minor setbacks discourage you! Uneven loops can be corrected by gently adjusting the ribbon length during creation. Loose knots require re-tying with a double knot for added security.

Address glitter shedding by using a strong adhesive and sealing the glitter with hairspray. Practice makes perfect – don’t be afraid to experiment and refine your technique!

Uneven Loops

Achieving symmetry is key! If loops appear unequal during construction, don’t panic. Gently pull and adjust the ribbon on each side while maintaining the center pinch.

Double-check loop sizes before securing the center with thread. Consistent ribbon width and even tension are crucial. Practice refining your loop creation for balanced results!

Loose Knots

Security is paramount! A loose knot can cause your beautiful bow to unravel. Always tie a double knot when securing the center, adding extra reinforcement.

Ensure the thread is pulled taut with each wrap around the bow’s center before knotting. Consider using a stronger thread or adding a small dot of fabric glue for ultimate hold.

Glitter Shedding

Minimize sparkle fallout! Glitter shedding is a common issue, but preventable. Apply a generous coat of glitter glue, ensuring complete ribbon coverage.

Once dry, seal the glitter with a spray adhesive or mod podge. Multiple thin coats are better than one thick one. Gently press the glitter into the adhesive for a secure bond, reducing mess.

Cheer Bow Safety Considerations

Prioritize safety! Always use high-quality, durable ribbon to prevent fraying and breakage. Ensure the bow is securely attached to the headband or clip, avoiding small, detachable parts.

A firmly attached bow minimizes choking hazards, especially for young cheerleaders. Regularly inspect bows for wear and tear, and replace damaged items immediately. Prioritize child safety above all else.

Ribbon Quality and Durability

Selecting superior ribbon is crucial. Opt for ribbons specifically designed for cheer bows, as they withstand frequent tying and movement. Look for tightly woven materials that resist fraying and maintain shape.

Durable ribbons ensure bows last longer and maintain a polished appearance. Higher quality ribbons also hold glitter and embellishments more effectively, enhancing overall bow longevity.

Secure Attachment to Avoid Choking Hazards

Safety is paramount when crafting cheer bows. Ensure a robust attachment between the bow and the headband or clip, using strong adhesive or secure stitching. Regularly inspect bows for loosening components.

Avoid small, detachable parts that could pose a choking risk, especially for young cheerleaders. Prioritize durable materials and construction to prevent accidental separation during activity.

Where to Buy Cheer Bow Supplies

Finding quality supplies is key to beautiful bows! Numerous online retailers specialize in cheerleading materials, offering a vast selection of ribbons, glitter, and embellishments. Explore options like Etsy and Amazon for diverse choices.

Don’t overlook local craft stores such as Joann Fabrics or Michaels, which often carry ribbon, glue, and basic supplies. Comparing prices and shipping costs is always recommended!

Online Retailers

Numerous online platforms cater specifically to cheer bow enthusiasts. Etsy boasts a wide array of handmade bows and supplies, alongside customizable options. Amazon provides convenience and competitive pricing on ribbons, glitter, and tools.

Dedicated cheer supply websites offer specialized ribbons and embellishments. Explore these options for unique materials and bulk discounts, streamlining your bow-making process!

Local Craft Stores

Don’t overlook the benefits of shopping at local craft stores! Stores like Joann Fabrics and Michaels offer a tangible shopping experience, allowing you to assess ribbon textures and glitter shades firsthand.

These stores frequently host classes and workshops, providing valuable hands-on learning opportunities. Plus, supporting local businesses strengthens your community and fosters creative connections!

Cheer Bow Trends and Inspiration

Stay ahead of the curve with current cheer bow trends! Popular colors often shift seasonally, with vibrant neons and metallic shades consistently in demand. Team-specific designs are huge – incorporate school colors, mascots, or even player numbers using heat transfer vinyl.

Explore online platforms like Pinterest and Instagram for endless inspiration and unique design ideas to elevate your creations!

Current Popular Colors and Designs

Trending now: bold, eye-catching color combinations! Think electric blues paired with shimmering silver, or vibrant pinks accented with gold glitter. Designs featuring ombre effects and holographic ribbons are also incredibly popular. Personalized bows with team names or logos, created with a Cricut, remain a strong choice.

Classic color blocking and playful patterns continue to be favorites, offering versatility for any cheer squad’s aesthetic.

Team-Specific Bow Ideas

Show your team spirit with customized cheer bows! Incorporate school colors prominently, using layered ribbons and contrasting accents. Utilize a Cricut to cut vinyl decals of mascots, initials, or slogans for the tails. Glitter in team shades adds extra sparkle and visibility during performances.

Consider unique designs reflecting team traditions or memorable moments, fostering unity and pride amongst cheerleaders.

Resources for Further Learning

Expand your bow-making skills with online resources! YouTube offers numerous video tutorials demonstrating various techniques, from basic loops to advanced customizations. Explore dedicated cheer bow making communities on social media platforms for inspiration, tips, and troubleshooting advice.

Websites like Bowdabra’s official channel provide detailed guides, while crafting blogs showcase innovative designs and material recommendations.

Online Video Tutorials

Unlock a wealth of knowledge through online video tutorials! YouTube is a fantastic resource, offering step-by-step guides for beginners and advanced bow makers alike. Search for “cheer bow tutorial” to discover demonstrations of hand-tying, Bowdabra techniques, and Cricut integration.

Bowdabra’s official channel provides focused instruction, while independent crafters share unique designs and helpful tips.

Cheer Bow Making Communities

Connect with fellow enthusiasts in vibrant online communities! Facebook groups dedicated to cheer bow making offer a supportive space to share creations, ask questions, and gain inspiration. These communities often host challenges and tutorials, fostering skill development.

Pinterest boards are brimming with ideas, while dedicated forums provide detailed discussions on techniques and materials, enhancing your cheer bow journey.

Categories
PDF

the warrior’s prayer david jeremiah pdf

The Warrior’s Prayer by David Jeremiah: A Comprehensive Guide

Discover a powerful spiritual tool! Dr. David Jeremiah’s The Warrior’s Prayer, available as a free PDF, guides believers in utilizing the full armor of God for daily victory.

Dr. David Jeremiah’s The Warrior’s Prayer is a compelling call to arms for believers, equipping them for the unseen battles of life. This isn’t a passive plea, but an active declaration, a strategic donning of God’s provided armor. The prayer isn’t simply about the armor of God, as described in Ephesians 6:10-18, but a focused prayer over each piece – the belt of truth, breastplate of righteousness, shoes of peace, shield of faith, helmet of salvation, and the sword of the Spirit.

Widely available as a free PDF download, this resource empowers individuals to move beyond simply knowing about spiritual warfare and into actively engaging in it. It’s a practical guide, offering a structured approach to prayer, transforming it from a wish list into a powerful, focused offensive. Dr. Jeremiah emphasizes preparation and intentionality, helping believers stand firm against the enemy’s schemes.

The Author: Dr. David Jeremiah

Dr. David Jeremiah is a highly respected and influential Christian author, pastor, and speaker. He’s the senior pastor of Shadow Mountain Community Church in El Cajon, California, and the founder of Turning Point Ministries, a globally recognized broadcasting ministry. His commitment to delivering biblical truth in a clear and relatable manner has resonated with millions worldwide;

Dr. Jeremiah has authored numerous bestselling books, consistently focusing on themes of faith, hope, and spiritual growth. The creation of resources like The Warrior’s Prayer, often offered as a free PDF, demonstrates his dedication to equipping believers with practical tools for their spiritual journey. He’s known for his insightful teachings on eschatology and his passionate defense of biblical principles. His work consistently emphasizes the importance of prayer and a strong relationship with God.

Understanding the Context: Spiritual Warfare

The Warrior’s Prayer, frequently available as a free PDF download, is rooted in the biblical concept of spiritual warfare. The Bible reveals that Christians don’t battle against flesh and blood, but against spiritual forces of evil (Ephesians 6:12). This prayer isn’t a magical formula, but a declaration of faith and a commitment to actively engage in this unseen conflict.

Dr. David Jeremiah emphasizes that understanding this context is crucial. The “armor of God” – truth, righteousness, peace, faith, salvation, and the Word – isn’t merely symbolic; it’s a practical provision for defense and offense. Praying through each piece, as outlined in the prayer, is a way to consciously equip oneself for daily challenges and resist the enemy’s attacks. Recognizing this battle empowers believers to live victoriously.

The Full Armor of God & The Prayer

Dr. Jeremiah’s Warrior’s Prayer, often found as a free PDF, systematically aligns with Ephesians 6, guiding believers to actively pray through each piece of God’s armor.

The Belt of Truth

Central to The Warrior’s Prayer, as detailed in the PDF resource by Dr. David Jeremiah, is the “Belt of Truth.” This foundational piece, drawn from Ephesians 6:14, represents a commitment to God’s Word and honest living.

Jeremiah emphasizes that truth isn’t merely intellectual assent, but a lifestyle impacting thoughts, words, and actions. Praying for the Belt of Truth involves actively choosing integrity and rejecting deception. The prayer encourages believers to ground themselves in biblical principles, allowing God’s truth to define their identity and guide their decisions.

Effectively, this armor piece prepares the warrior for spiritual battle by securing their foundation. Dr. Jeremiah’s guidance within the downloadable PDF stresses that without truth, the other pieces of armor lose their effectiveness, leaving one vulnerable to the enemy’s lies.

The Breastplate of Righteousness

According to Dr. David Jeremiah’s The Warrior’s Prayer, readily available as a PDF, the “Breastplate of Righteousness” – inspired by Ephesians 6:14 – safeguards the heart from spiritual attack. This isn’t about personal righteousness, but embracing the perfect righteousness of Christ imputed to believers.

The prayer focuses on acknowledging God’s forgiveness and relying on His justice, rather than striving for self-achieved perfection. Jeremiah explains that this armor piece protects against condemnation, doubt, and the enemy’s accusations. It’s a shield for the affections, ensuring a pure and devoted heart towards God.

Through consistent prayer, as outlined in the downloadable PDF, believers can strengthen this defense, maintaining a clear conscience and unwavering faith. This vital component prepares the warrior for courageous engagement in spiritual warfare.

The Shoes of the Gospel of Peace

Dr. David Jeremiah’s The Warrior’s Prayer, accessible as a PDF resource, highlights the “Shoes of the Gospel of Peace” (Ephesians 6:15) as essential for firm footing in spiritual battle. These aren’t merely comfortable footwear, but represent a readiness to share the life-transforming message of Jesus Christ.

The prayer emphasizes a proactive stance, equipped to boldly proclaim peace – reconciliation with God – to a world desperately in need. Jeremiah clarifies that this peace isn’t simply the absence of conflict, but a divine provision enabling courageous witness.

Downloading the PDF reveals how this armor piece empowers believers to advance against the enemy, unshaken by opposition. It’s a call to live out the Gospel, demonstrating God’s love and extending His offer of salvation to all.

The Shield of Faith

Dr. David Jeremiah’s The Warrior’s Prayer, readily available as a PDF download, underscores the vital role of “The Shield of Faith” (Ephesians 6:16) in deflecting the fiery darts of the enemy. This isn’t passive protection, but an active trust in God’s promises and unwavering belief in His power.

The prayer guides believers to cultivate a deep-seated faith, confident in God’s ability to overcome any obstacle. Jeremiah explains that this shield extinguishes the doubts, fears, and temptations hurled against us during spiritual warfare.

Accessing the PDF resource reveals how a strong faith, rooted in the Word of God, becomes an impenetrable defense. It’s a reminder that our confidence isn’t in ourselves, but in the faithfulness of our Almighty God, securing victory.

The Helmet of Salvation

Dr. David Jeremiah’s impactful The Warrior’s Prayer, conveniently found as a PDF, highlights “The Helmet of Salvation” (Ephesians 6:17) as crucial protection for the mind. This piece of armor safeguards our thoughts, ensuring they align with God’s truth and resist the enemy’s deception.

The prayer emphasizes the assurance of our salvation – a firm belief in Jesus Christ and the redemption He offers. Jeremiah explains that a secured mind, focused on God’s promises, prevents doubt and fear from taking root.

Downloading the PDF resource reveals how to actively claim this protection, renewing the mind through scripture and prayer. It’s a powerful reminder that a confident understanding of our salvation is essential for spiritual victory and steadfastness.

The Sword of the Spirit (The Word of God)

Dr. David Jeremiah’s The Warrior’s Prayer, readily available as a PDF, identifies “The Sword of the Spirit” – the Word of God (Ephesians 6:17) – as our primary offensive weapon in spiritual warfare. This isn’t merely reading scripture, but actively wielding its truth against the enemy’s lies.

The prayer emphasizes memorization and meditation on God’s Word, enabling us to respond with biblical truth in challenging situations. Jeremiah stresses that knowing scripture equips us to discern deception and proclaim God’s power.

Downloading the PDF provides guidance on effectively utilizing the Word as a weapon, transforming us into confident, articulate defenders of the faith. It’s a call to actively engage with scripture, allowing it to shape our thoughts and actions.

Detailed Breakdown of the Prayer Components

Explore The Warrior’s Prayer PDF by Dr. David Jeremiah, offering a focused prayer for each piece of God’s armor, enhancing spiritual strength!

Praying for the Belt of Truth

Utilizing Dr. David Jeremiah’s The Warrior’s Prayer PDF, begin by consciously praying for the “Belt of Truth.” This foundational piece, representing God’s Word, secures your spiritual stance against deception. Specifically, ask for discernment to recognize and reject falsehoods, embracing biblical principles in every thought and action.

Petition for a deeper understanding of scripture, allowing its truth to permeate your mind and guide your decisions. Pray for boldness to speak truth in love, even when facing opposition. Acknowledge that truth is not merely intellectual assent, but a transformative power that aligns your life with God’s will. Embrace the reality that Satan is the father of lies, and rely on the Holy Spirit to reveal all untruth.

Confess any areas where you’ve compromised truth, seeking forgiveness and strength to live authentically. Remember, the Belt of Truth isn’t just about knowing the Bible; it’s about living a life rooted in its unwavering principles.

Praying for the Breastplate of Righteousness

Referring to Dr. David Jeremiah’s The Warrior’s Prayer PDF, focus your petition on the “Breastplate of Righteousness.” This symbolizes God’s perfect righteousness imputed to believers through faith in Jesus Christ. Pray for a renewed awareness of your standing before God, not based on your own merits, but on His grace.

Ask for the strength to live a life that reflects God’s holy standards, resisting temptation and pursuing purity. Confess any unrighteousness in your thoughts, words, or deeds, receiving His forgiveness and cleansing. Recognize that this breastplate protects your heart – the seat of your emotions and will – from the attacks of condemnation and guilt.

Petition for a deeper understanding of God’s justice and mercy, allowing it to shape your interactions with others. Embrace the assurance that in Christ, you are clothed with righteousness, making you acceptable to God and equipped for spiritual battle.

Praying for the Shoes of the Gospel of Peace

Utilizing Dr. David Jeremiah’s The Warrior’s Prayer PDF, dedicate your prayer to the “Shoes of the Gospel of Peace.” These represent your readiness to share the good news of Jesus Christ with a world desperately needing hope. Pray for boldness and opportunity to proclaim the Gospel effectively, overcoming fear and hesitation.

Ask for God to prepare the hearts of those you encounter, making them receptive to the message of salvation. Seek a spirit of peace within yourself, allowing God’s tranquility to guide your words and actions. Recognize that these shoes enable you to firmly stand on the foundation of the Gospel, resisting the shifting sands of worldly ideologies.

Petition for a passion to be an ambassador for Christ, extending His peace to others. Embrace the responsibility of sharing the life-changing message of reconciliation with God.

Praying for the Shield of Faith

Referring to Dr. David Jeremiah’s The Warrior’s Prayer PDF, focus your intercession on the “Shield of Faith.” This vital piece of armor deflects the fiery darts of the enemy – doubt, discouragement, and temptation. Pray for an unwavering trust in God’s promises, strengthening your belief even amidst trials.

Ask for increased confidence in God’s power and protection, knowing He is able to overcome any obstacle. Seek a deeper understanding of His faithfulness, recalling past victories and relying on His consistent character. Recognize that faith isn’t simply believing in God, but believing God.

Petition for the ability to extinguish the attacks of negativity and fear with the assurance of God’s love. Embrace faith as your defense, standing firm against spiritual opposition.

Praying for the Helmet of Salvation

According to Dr. David Jeremiah’s The Warrior’s Prayer, readily available as a PDF, the “Helmet of Salvation” safeguards your mind. Pray for a firm grasp of your redemption, continually renewing your awareness of God’s saving grace and the assurance of eternal life. Focus on the completed work of Christ on the cross.

Ask for protection against deceptive thoughts and false doctrines that can cloud your judgment and lead you astray. Seek clarity of mind, allowing the Holy Spirit to illuminate truth and dispel confusion. Recognize that a secure salvation fosters peace and confidence.

Petition for a renewed mind, transformed by God’s Word, and a steadfast hope anchored in His promises. Embrace the truth of your identity in Christ, resisting the enemy’s attempts to undermine your faith.

Praying for the Sword of the Spirit

Dr. David Jeremiah’s The Warrior’s Prayer, accessible as a PDF download, identifies the “Sword of the Spirit” as the Word of God – powerful and effective. Pray for a deeper understanding and skillful application of Scripture in every area of your life. Ask for discernment to wield God’s Word accurately, exposing falsehood and defending truth.

Commit to consistent study and meditation on the Bible, allowing it to shape your thoughts, beliefs, and actions. Seek the Holy Spirit’s guidance to know what Scripture to apply in specific situations. Recognize that the Word is not merely information, but a dynamic force capable of transforming lives.

Petition for boldness to share God’s truth with others, even in the face of opposition. Embrace the authority of Scripture, trusting that it will accomplish God’s purposes.

Accessing the Warrior’s Prayer

Download The Warrior’s Prayer PDF from Dr. Jeremiah’s website, or request a free bookmark to guide you through this impactful prayer resource!

Downloading the PDF Version

Accessing The Warrior’s Prayer in PDF format is remarkably straightforward! Dr. David Jeremiah’s official website provides a readily available download for this powerful resource. Simply navigate to the designated section – often found within the free resources or downloadable content area – and click to initiate the download.

This PDF version allows you to conveniently study and utilize the prayer offline, making it ideal for personal devotion or group settings; The document is designed for easy reading and reference, ensuring you can quickly access the scriptural foundation and practical guidance offered within. It’s a fantastic way to integrate this vital prayer practice into your daily spiritual routine, fostering a stronger connection with God and equipping you for spiritual battles.

Ensure you are downloading from a trusted source – Dr. Jeremiah’s website – to guarantee the authenticity and integrity of the material.

Free Resources & Bookmarks

Enhance your prayer life with the complimentary resources accompanying The Warrior’s Prayer! Beyond the PDF download, Dr. David Jeremiah offers a beautifully designed bookmark featuring key elements of the prayer. This bookmark serves as a constant reminder to actively engage in spiritual warfare and utilize the full armor of God.

These free resources are strategically designed to support consistent prayer and deepen your understanding of spiritual principles. The bookmark is particularly useful for personal study or as a thoughtful gift for fellow believers. Dr. Jeremiah’s website frequently updates its offerings, so be sure to explore for additional tools like charts and devotionals.

Utilizing these resources alongside the PDF version of The Warrior’s Prayer creates a holistic approach to strengthening your faith and living a victorious Christian life.

Availability on Dr. Jeremiah’s Website

Dr. David Jeremiah’s official website serves as the primary hub for accessing The Warrior’s Prayer in PDF format, alongside a wealth of related materials. Visitors can easily locate the prayer resource through the site’s search function or by navigating to the “Resources” or “Free Offers” sections.

The website frequently features updated versions and accompanying study guides, ensuring users have the most current information. Beyond the PDF, the site provides access to teachings from Dr. Jeremiah on spiritual warfare and the importance of prayer.

Regularly checking the website allows you to discover new content and deepen your understanding of this powerful prayer tool. It’s a convenient and reliable source for all things related to The Warrior’s Prayer and Dr. Jeremiah’s ministry.

The Significance of Being a Prayer Warrior

Embrace spiritual battles! David Jeremiah emphasizes that utilizing The Warrior’s Prayer – often found as a free PDF – empowers believers for victorious living.

Defining a Prayer Warrior

A prayer warrior, as illuminated by Dr. David Jeremiah, isn’t simply someone who prays frequently, but one who strategically engages in spiritual combat through consistent, focused prayer. This concept is powerfully embodied in The Warrior’s Prayer, readily accessible as a free PDF download.

Jeremiah teaches that a true prayer warrior understands the reality of spiritual warfare and actively utilizes the “whole armor of God” – a central theme within the prayer itself. It’s about more than asking for blessings; it’s about interceding, standing firm in faith, and declaring God’s truth.

The Warrior’s Prayer, often obtained as a PDF, serves as a practical guide, equipping individuals to consistently “don” each piece of armor through targeted prayer. Becoming a prayer warrior means embracing a lifestyle of intentionality, seeking God’s will, and actively participating in His Kingdom work. It’s a commitment to relentless faith!

The Role of Prayer in Spiritual Victory

Dr. David Jeremiah emphasizes that prayer isn’t a passive request, but a vital component of achieving spiritual victory, powerfully illustrated in The Warrior’s Prayer – often found as a free PDF resource. This prayer isn’t merely a recitation; it’s an active declaration of faith and a strategic deployment of God’s power.

The prayer, based on Ephesians 6, equips believers to stand against “dark forces,” recognizing that our battle isn’t against people, but against spiritual opposition. By consistently praying through each piece of the armor of God, as outlined in the PDF, we strengthen our defenses and prepare for engagement.

Ultimately, The Warrior’s Prayer demonstrates that spiritual victory isn’t automatic; it’s earned through diligent, intentional prayer. It’s about claiming God’s promises, resisting temptation, and advancing His Kingdom with unwavering faith. Download the PDF and begin your journey!

Applying the Prayer in Daily Life

Integrating The Warrior’s Prayer, readily available as a free PDF from Dr. David Jeremiah’s resources, into your daily routine transforms spiritual defense from a concept into a lived reality. Begin each day consciously “putting on” the armor of God, praying specifically for each piece – Truth, Righteousness, Peace, Faith, Salvation, and the Spirit’s Word.

Don’t simply rush through the prayer; visualize yourself being equipped, feeling the strength and protection each element provides. Use the PDF as a guide, reflecting on how each piece applies to the challenges you anticipate facing.

Furthermore, revisit the prayer throughout the day, especially during moments of temptation or difficulty. This consistent practice cultivates a mindset of spiritual readiness, empowering you to live victoriously and experience God’s peace. Download the PDF today!

Additional Resources & Related Topics

Explore further with Dr. Jeremiah’s “Armor of the Believer Chart” and insights on “Courtroom Prayer,” enhancing your understanding of spiritual warfare—download the PDF!

The Armor of the Believer Chart

Visualize your spiritual defense with Dr. David Jeremiah’s comprehensive “Armor of the Believer Chart.” This full-color diagram, often offered as a free download alongside resources like The Warrior’s Prayer PDF, provides a detailed breakdown of each piece of God’s armor as described in Ephesians 6:10-18.

The chart meticulously illustrates the Belt of Truth, Breastplate of Righteousness, Shoes of the Gospel of Peace, Shield of Faith, Helmet of Salvation, and the Sword of the Spirit (the Word of God). It’s an invaluable tool for understanding how to practically apply each element in your daily life and prayer.

By visually connecting each piece of armor to its corresponding spiritual benefit, the chart empowers you to actively “put on” the full armor of God, preparing for spiritual battles and living in consistent victory. It complements The Warrior’s Prayer beautifully, offering a tangible aid to focused, effective prayer.

Courtroom Prayer & Spiritual Authority

Dr. David Jeremiah’s teachings often extend beyond personal prayer into the realm of spiritual authority and “courtroom prayer.” This concept, frequently discussed alongside resources like The Warrior’s Prayer PDF, emphasizes believers’ access to divine power and the ability to influence spiritual realms through focused intercession.

The idea stems from understanding spiritual warfare – that battles are fought not just in the physical world, but also in the unseen. “Courtroom prayer” involves presenting requests before God as if in a legal setting, appealing to His promises and exercising the authority granted through Christ.

Resources related to this topic often encourage believers to declare God’s Word, resist the enemy, and claim victory in specific areas of life. Utilizing The Warrior’s Prayer as a foundation, individuals can confidently approach God, equipped with the full armor, and engage in powerful, authoritative prayer.

Living in Spiritual Victory

Dr. David Jeremiah’s The Warrior’s Prayer PDF isn’t simply about reciting words; it’s a pathway to consistently experiencing spiritual victory in daily life. The prayer, rooted in Ephesians 6, equips believers to proactively engage in spiritual warfare, rather than reactively responding to challenges.

By intentionally “putting on the whole armor of God” through prayer – focusing on truth, righteousness, peace, faith, salvation, and the Word – individuals fortify themselves against the enemy’s attacks. This isn’t a one-time event, but a daily discipline.

Living in spiritual victory means approaching each day with confidence, knowing you are empowered by God and protected by His armor. It’s about recognizing your authority in Christ and consistently applying the principles outlined in The Warrior’s Prayer to every aspect of your life, resulting in lasting transformation.

Date of Information Compilation: 12/09/2025

This compilation regarding Dr. David Jeremiah’s The Warrior’s Prayer and associated resources was last updated on December 9th, 2025. Information concerning the availability of the PDF version, free bookmarks, and website access was verified as current on this date.

Details about related topics, such as the Armor of the Believer chart and courtroom prayer, were also confirmed. While resources are generally stable, website links and downloadable content are subject to change.

Users are encouraged to revisit Dr. Jeremiah’s official website for the most up-to-date information. The provided details reflect the status as of 15:07:16 () on the compilation date, ensuring accuracy and relevance for those seeking to utilize this powerful prayer tool.

Categories
Guide

dragon spirit guide colors

Dragon Spirit Guide Colors: An In-Depth Exploration

Dragon lore‚ spanning cultures‚ reveals diverse meanings tied to color; from fiery Western depictions to benevolent Eastern symbols‚ shades profoundly impact spiritual interpretation.

Historically‚ translation complexities—like missionary Mareeson’s linking of Chinese dragon to the biblical dragon—influenced Western understanding‚ yet nuances persist.

Modern scholarship acknowledges cultural uniqueness‚ challenging direct equivalencies; discerning dragon colors unlocks deeper insights into guidance and personal resonance.

Dragon Spirit Guides are powerful‚ ancient entities offering wisdom‚ protection‚ and transformative energy. These majestic beings aren’t merely mythical creatures; they are vibrant spiritual allies deeply connected to the earth’s energy and the collective unconscious. Their presence has been recognized across diverse cultures for millennia‚ from the revered loong of the East to the formidable dragons of Western lore.

The emergence of a dragon as a spirit guide signifies a period of significant personal growth and change. They often appear when individuals are ready to embrace their inner power‚ overcome obstacles‚ and step into their authentic selves. Understanding the specific color of your dragon guide is crucial‚ as each hue carries unique symbolism and reveals specific aspects of their guidance.

The historical context of dragon representation‚ even influenced by translations like those proposed by early missionaries‚ highlights the enduring power of these symbols. Recognizing this rich history enhances our connection to these magnificent guides.

The Significance of Color in Spiritual Guidance

Color acts as a fundamental language in the spiritual realm‚ conveying nuanced energies and messages beyond verbal communication. Each shade vibrates at a specific frequency‚ resonating with different chakras‚ emotions‚ and aspects of consciousness. When a dragon spirit guide presents in a particular color‚ it’s not arbitrary; it’s a deliberate transmission of information tailored to your individual journey.

The interpretation of dragon colors builds upon established color symbolism within spiritual practices; However‚ it’s vital to remember that cultural context matters. The Western association of red with passion and danger differs from Eastern interpretations where it symbolizes luck and prosperity.

Understanding these distinctions‚ and acknowledging the evolving understanding of dragon symbolism—moving beyond simplistic “evil” versus “good” categorizations—allows for a more profound connection with your guide’s message. The very act of recognizing the color initiates a deeper dialogue.

Understanding Dragon Colors and Their Meanings

Dragon spirit guide colors offer profound insights into their energies and the messages they carry‚ reflecting both Eastern and Western symbolic traditions and nuances.

Red Dragon Spirit Guides

Red dragons embody potent life force energy‚ representing passion‚ courage‚ and raw power. Often associated with the element of fire‚ these guides ignite action and drive‚ urging you to embrace your inner strength and pursue your desires with unwavering determination.

However‚ red also signifies potential for chaos or destruction if unchecked. A red dragon guide may appear when you need to address anger‚ impulsivity‚ or a tendency towards aggression‚ prompting self-awareness and balanced expression.

Drawing upon the Western tradition of dragons as symbols of challenge‚ a red dragon could indicate upcoming obstacles requiring bravery. Conversely‚ mirroring Eastern symbolism‚ it may herald good fortune and vitality‚ particularly in matters of the heart or creative endeavors. They encourage you to live fully and authentically.

Gold Dragon Spirit Guides

Gold dragons radiate wisdom‚ abundance‚ and spiritual illumination. Representing the sun’s energy‚ these majestic guides signify enlightenment‚ prosperity‚ and a deep connection to divine consciousness. They often appear to those on a path of spiritual awakening‚ offering guidance and support in unlocking their highest potential.

Associated with wealth and success‚ a gold dragon doesn’t merely indicate material gain‚ but rather the abundance of joy‚ fulfillment‚ and inner peace. They encourage you to recognize your inherent worth and embrace opportunities for growth.

Historically‚ dragons guarding treasure symbolize protection of valuable knowledge. A gold dragon may be safeguarding your inner wisdom‚ urging you to trust your intuition and embrace your unique gifts. They represent a harmonious blend of power and compassion.

Green Dragon Spirit Guides

Green dragon spirit guides embody growth‚ healing‚ and the nurturing power of nature. Connected to the Earth element‚ they represent fertility‚ abundance‚ and a deep connection to the natural world. These guides often appear to those seeking balance‚ harmony‚ and a renewed sense of vitality.

Symbolizing renewal and rejuvenation‚ a green dragon encourages you to embrace change and release what no longer serves you. They support emotional healing‚ promoting self-love and acceptance. They are powerful allies for those working with energy healing or seeking to deepen their connection to the Earth.

Like the lush landscapes they represent‚ green dragons foster creativity and inspire new beginnings. They remind us of the cyclical nature of life and the importance of honoring our roots while reaching for the sky.

Blue Dragon Spirit Guides

Blue dragon spirit guides represent wisdom‚ tranquility‚ and the power of communication. Associated with the element of water and the throat chakra‚ they encourage authentic expression and clear articulation of your truth. These guides often appear to those on a path of spiritual awakening‚ seeking deeper understanding and inner peace.

Symbolizing serenity and intuition‚ a blue dragon fosters emotional intelligence and encourages you to trust your inner voice. They support effective communication‚ helping you navigate challenging conversations with grace and clarity. They are powerful allies for healers‚ teachers‚ and anyone seeking to inspire others.

Like the vastness of the ocean‚ blue dragons represent limitless potential and the flow of consciousness. They remind us of the importance of self-expression and the power of words to create positive change.

Black Dragon Spirit Guides

Black dragon spirit guides are often misunderstood‚ representing not darkness or evil‚ but profound transformation and the unveiling of hidden truths. They are powerful protectors‚ guarding ancient wisdom and challenging you to confront your shadow self. These guides emerge when deep‚ internal work is required‚ urging you to release limiting beliefs and embrace your authentic power.

Associated with the root chakra and the element of earth‚ black dragons ground you in reality while simultaneously pushing you beyond perceived limitations. They symbolize the fertile darkness from which new growth emerges‚ encouraging you to embrace change and navigate the unknown with courage.

Don’t fear their intensity; a black dragon’s presence signifies a potent opportunity for profound healing and spiritual evolution. They demand honesty and self-awareness‚ guiding you towards wholeness.

White Dragon Spirit Guides

White dragon spirit guides embody purity‚ enlightenment‚ and spiritual ascension. They represent a connection to higher realms and offer guidance on your path to illumination. Often associated with the crown chakra and the element of spirit‚ these majestic beings signify clarity‚ truth‚ and unconditional love.

Unlike some depictions of dragons as chaotic forces‚ white dragons are beacons of benevolent energy‚ assisting in healing‚ manifestation‚ and the realization of your soul’s purpose. Their presence indicates a time of profound spiritual awakening and a deepening connection to your intuition.

Embrace the white dragon’s energy to release negativity‚ cultivate inner peace‚ and align with your highest self. They encourage you to trust the universe and embrace the transformative power of light.

Purple Dragon Spirit Guides

Purple dragon spirit guides represent transformation‚ psychic abilities‚ and a deep connection to the mystical realms. Associated with the third eye chakra‚ they enhance intuition‚ spiritual awareness‚ and inner wisdom. These dragons often appear when you are undergoing significant personal growth or are ready to explore your psychic potential.

The color purple symbolizes royalty and power‚ indicating that these guides assist in claiming your personal authority and manifesting your desires. They encourage you to trust your instincts and embrace the magic within. Purple dragons are also linked to healing and the release of karmic patterns.

If a purple dragon appears to you‚ it’s a sign to delve deeper into your spiritual practice and embrace the transformative energies available to you.

Deeper Dive into Specific Color Combinations

Dragon color blends amplify individual energies‚ creating nuanced guidance; combinations reveal complex layers of meaning‚ offering profound insights into life’s journey.

Red and Gold Dragon Spirit Guides

Red and gold dragon spirit guides represent a potent combination of fiery life force energy and abundant prosperity. Red‚ often associated with passion‚ courage‚ and raw power‚ signifies a surge of motivation and the strength to overcome obstacles. This color embodies action‚ vitality‚ and a grounding connection to the physical realm.

Gold‚ conversely‚ radiates divine wisdom‚ illumination‚ and success. It symbolizes inner wealth‚ spiritual awakening‚ and the manifestation of desires. When combined‚ these colors indicate a period of significant transformation and achievement. A red and gold dragon suggests you are being supported in pursuing your ambitions with unwavering confidence and attracting positive outcomes.

This pairing often appears when you are ready to step into your power‚ embrace leadership roles‚ and manifest abundance in all areas of your life. It’s a call to action‚ urging you to trust your instincts and pursue your goals with unwavering determination. The energy is dynamic‚ encouraging boldness and a proactive approach to life’s challenges.

Green and Blue Dragon Spirit Guides

Green and blue dragon spirit guides embody a harmonious blend of growth‚ healing‚ and tranquil wisdom. Green‚ deeply connected to nature‚ signifies renewal‚ abundance‚ and emotional balance. It represents a strong connection to the earth and the nurturing energies of the natural world‚ fostering a sense of peace and well-being.

Blue‚ conversely‚ resonates with communication‚ intuition‚ and spiritual clarity. It symbolizes truth‚ loyalty‚ and a deep connection to inner wisdom. Together‚ these colors indicate a period of profound healing and spiritual growth‚ encouraging open communication and authentic self-expression.

A green and blue dragon suggests you are being guided to align with your higher purpose‚ embrace your intuitive gifts‚ and cultivate a life of harmony and balance. This pairing fosters emotional healing‚ encourages self-compassion‚ and supports the development of strong‚ healthy boundaries.

Black and White Dragon Spirit Guides

Black and white dragon spirit guides represent a powerful duality – the balance between shadow and light‚ endings and beginnings‚ and the seen and unseen realms. Black isn’t necessarily negative; it symbolizes protection‚ grounding‚ and the acceptance of hidden aspects of the self. It encourages facing fears and releasing what no longer serves you.

White embodies purity‚ clarity‚ and spiritual awakening. It signifies new beginnings‚ hope‚ and a connection to higher consciousness. Together‚ these colors indicate a transformative period of profound change and spiritual evolution.

A black and white dragon suggests you are being called to integrate your shadow self‚ embrace your full potential‚ and step into your authentic power. This pairing fosters self-awareness‚ encourages honesty‚ and supports the release of limiting beliefs.

Purple and Gold Dragon Spirit Guides

Purple and gold dragon spirit guides embody a potent combination of spiritual wisdom and abundant manifestation. Purple‚ linked to the crown chakra‚ signifies heightened intuition‚ psychic abilities‚ and a deep connection to the divine. It encourages spiritual growth‚ inner knowing‚ and the exploration of mystical realms.

Gold represents prosperity‚ success‚ and the realization of your highest potential. It’s a color of abundance‚ confidence‚ and radiant energy. Together‚ these colors indicate a time of powerful manifestation and spiritual alignment.

A purple and gold dragon suggests you are being guided to utilize your spiritual gifts to create a life of abundance and purpose. This pairing fosters creativity‚ encourages self-worth‚ and supports the manifestation of your dreams.

Connecting with Your Dragon Spirit Guide

Discovering your dragon’s color unlocks deeper communication; meditation‚ dream analysis‚ and energy work facilitate connection‚ fostering wisdom and personal transformation.

Identifying Your Dragon’s Color

Pinpointing your dragon spirit guide’s color requires attentive self-reflection and open-minded exploration. Begin by noticing recurring colors in your meditations‚ visualizations‚ or dreams. Pay close attention to the hues that evoke strong emotional responses – joy‚ peace‚ or even a sense of challenge. These colors often hold significant clues.

Consider the colors you’re naturally drawn to in art‚ clothing‚ or your surroundings. Are you consistently reaching for shades of red‚ gold‚ or blue? These preferences might reflect your dragon’s energetic signature. Furthermore‚ observe any unusual color phenomena – orbs appearing in photographs‚ vibrant auras during energy work‚ or unexpected color symbolism in everyday life.

Remember‚ the initial color identification might not be definitive. Your dragon may reveal its true color gradually‚ through a series of subtle signs and synchronicities. Trust your intuition and remain open to receiving guidance. The process is about building a relationship‚ and the color will become clearer as your connection deepens.

Meditation and Dragon Spirit Guides

Meditation serves as a powerful conduit for connecting with your dragon spirit guide‚ particularly for discerning their color. Begin by creating a sacred space‚ free from distractions‚ and grounding yourself through deep‚ conscious breathing. Visualize a vibrant‚ swirling energy surrounding you‚ inviting your dragon to appear.

Don’t attempt to force a vision; instead‚ allow images and colors to emerge organically. Focus on any colors that present themselves – they may appear as a radiant aura‚ shimmering scales‚ or even a subtle tint within your inner vision. Ask your dragon directly about its color‚ and be receptive to any intuitive impressions or feelings that arise.

Consistent practice strengthens the connection‚ allowing for clearer communication. Journaling your experiences immediately after meditation can help you decipher the symbolism of the colors and deepen your understanding of your dragon’s message.

Dream Interpretation and Dragon Colors

Dreams offer a rich landscape for encountering your dragon spirit guide and uncovering the significance of their color. Pay close attention to any dragon appearances‚ noting the specific shade dominating the vision. Was it a fiery red‚ a regal gold‚ or a serene blue? These colors aren’t random; they hold vital clues.

Consider the context of the dream. What emotions did the dragon evoke? What was happening in the dreamscape? These elements‚ combined with the color‚ provide a layered interpretation. For example‚ a black dragon in a dream might symbolize shadow work‚ while a white dragon could represent purity and new beginnings.

Keep a dream journal and record details immediately upon waking. Reflect on how the dragon’s color resonates with your waking life challenges and opportunities. Trust your intuition – your subconscious mind is communicating valuable insights.

Working with Dragon Energy

Harnessing dragon energy involves consciously connecting with the power embodied by your spirit guide’s color. Begin by visualizing your dragon‚ focusing on its hue and allowing its energy to fill your aura. This practice amplifies the specific qualities associated with that color.

For instance‚ if your guide is gold‚ visualize golden light radiating from its scales‚ invoking abundance and wisdom. Red dragon energy can be channeled for courage and passion‚ while green promotes healing and growth. Regular meditation with your dragon strengthens the bond.

Utilize crystals corresponding to your dragon’s color to further amplify the connection. Incorporate imagery and symbols representing your dragon into your sacred space. Remember‚ respectful intention and a clear purpose are key to effective energy work.

Cultural Perspectives on Dragon Colors

Eastern and Western traditions imbue dragon colors with distinct symbolism; understanding these differences—from chaotic Western fire to benevolent Eastern power—is crucial for interpretation.

Historical translation‚ like the 19th-century missionary work‚ shaped perceptions‚ yet cultural nuances remain vital when exploring dragon color meanings.

Acknowledging these perspectives enriches your connection to your dragon spirit guide.

Eastern Dragon Color Symbolism

Eastern dragon color symbolism is deeply rooted in ancient philosophies and imperial traditions‚ diverging significantly from Western interpretations. Gold and yellow dragons historically represented the Emperor and imperial power‚ embodying authority‚ wisdom‚ and good fortune. Red dragons symbolized luck‚ happiness‚ and prosperity‚ frequently appearing during celebrations and festivals.

Blue dragons were associated with spring and growth‚ representing healing and renewal. Green dragons signified life‚ harmony‚ and the natural world‚ often linked to agriculture and abundance. Black dragons‚ while sometimes representing power‚ could also symbolize mystery and the unknown. White dragons‚ less common‚ embodied purity and mourning.

These colors weren’t simply aesthetic choices; they were imbued with cosmological significance‚ reflecting the five elements and the balance of Yin and Yang. Understanding this context is vital when interpreting the message of an Eastern dragon spirit guide‚ as the color directly relates to the energies it embodies and the guidance it offers.

Western Dragon Color Symbolism

Western dragon color symbolism‚ heavily influenced by European folklore and Christian mythology‚ often associates dragons with chaos‚ evil‚ and the forces of darkness. Red dragons‚ frequently depicted as fire-breathing beasts‚ traditionally represented destruction‚ war‚ and primal energy. Black dragons were similarly linked to darkness‚ death‚ and the underworld‚ embodying fear and the unknown.

Gold dragons‚ though less common‚ sometimes symbolized greed and the hoarding of treasure‚ reflecting materialistic desires. Green dragons could represent envy and poison‚ while blue dragons were occasionally associated with the sea and its unpredictable nature. White dragons‚ often found in colder climates‚ symbolized winter‚ death‚ and isolation.

However‚ interpretations are evolving; some modern perspectives view dragon colors as representing different aspects of power and wisdom. Recognizing this historical context is crucial when working with a Western dragon spirit guide‚ acknowledging the potential for both challenging and transformative energies.

The Evolution of Dragon Color Meanings

Dragon color meanings haven’t remained static; they’ve undergone significant evolution‚ shaped by cultural exchange and shifting spiritual perspectives. Early Western interpretations‚ influenced by biblical imagery – like the association made by missionary Mareeson – often cast dragons‚ and their colors‚ in a negative light‚ linking them to evil and chaos.

However‚ increased awareness of Eastern traditions‚ where dragons are revered as benevolent and powerful beings‚ has prompted a re-evaluation. Modern spiritual practices increasingly recognize dragons as complex entities embodying both light and shadow.

The recent academic shift away from strict Western-centric translations of concepts like “dragon” (versus “loong”) reflects a broader acknowledgement of cultural nuance. Consequently‚ color symbolism is now understood as more fluid and individualized‚ dependent on personal connection and intuitive understanding rather than rigid historical definitions.

Advanced Concepts

Dragon energies intertwine with auras‚ shadow work‚ and daily integration; exploring these facets deepens connection‚ revealing wisdom beyond simple color interpretations and cultural origins.

Auras and Dragon Spirit Guide Colors

Dragon Spirit Guide colors often mirror or amplify aspects of an individual’s aura‚ creating a resonant energetic signature. Understanding your personal aura – whether through intuitive sensing‚ psychic readings‚ or aura photography – can provide clues about the dragon guiding you.

For example‚ a predominantly red aura might attract a Red Dragon‚ signifying passion and primal energy‚ while a blue aura could indicate a Blue Dragon focused on communication and healing. However‚ it’s not always a direct match; a dragon might present a color complementary to your aura‚ highlighting areas needing development.

Furthermore‚ shifts in your aura color can signal changes in your dragon guide’s focus or the lessons they are presenting. Observing these correlations requires self-awareness and consistent energetic practice. The interplay between aura and dragon color offers a nuanced understanding of your spiritual path.

Shadow Work with Dragon Guides

Dragon Spirit Guides‚ particularly those embodying darker hues like Black or Purple‚ can be potent allies in shadow work – the process of integrating repressed aspects of the self. These dragons don’t represent negativity‚ but rather illuminate it‚ bringing hidden fears‚ traumas‚ and limiting beliefs to the surface.

A Black Dragon might reveal deeply buried wounds‚ demanding acknowledgment and healing‚ while a Purple Dragon could expose patterns of self-sabotage or unhealthy power dynamics. This process isn’t always comfortable; dragons are fierce and direct‚ refusing to allow avoidance.

However‚ their intensity is rooted in unconditional love and a desire for your wholeness. Working with a dragon in shadow work requires courage‚ honesty‚ and a willingness to confront uncomfortable truths‚ ultimately leading to profound transformation and self-mastery.

Integrating Dragon Wisdom into Daily Life

Once connected with your Dragon Spirit Guide – understanding its color and associated energies – integration into daily life becomes key. This isn’t about grand gestures‚ but consistent alignment with the dragon’s essence. A Red Dragon might inspire courageous action‚ prompting you to pursue passions or set firm boundaries.

A Gold Dragon encourages manifesting abundance‚ reminding you of your inherent worth and potential. Green Dragons foster growth and healing‚ prompting self-care and connection with nature. Even acknowledging your dragon’s presence during mundane tasks – like visualizing its color during your commute – strengthens the bond.

Ultimately‚ integrating dragon wisdom is about embodying their qualities – power‚ wisdom‚ courage‚ and compassion – in every aspect of your being‚ transforming challenges into opportunities for growth.

The Future of Dragon Spirit Guide Work

The evolving understanding of dragon lore‚ moving beyond simplistic Western versus Eastern interpretations‚ fuels the future of spirit guide work. As scholarship acknowledges cultural nuances – like the historical translation debates surrounding “dragon” and “loong” – a more holistic approach emerges.

Expect increased focus on the subtle energies of dragon colors‚ moving beyond basic symbolism to explore their impact on auras and energetic fields. The recognition that imposing Western frameworks onto Eastern concepts is limiting will drive deeper‚ more respectful exploration.

Technological advancements may offer new ways to visualize and interact with dragon energies‚ while a growing emphasis on shadow work will unlock deeper levels of wisdom and healing through these powerful guides.

Categories
Manuals

citizens skyhawk eco drive manual

Citizen Skyhawk Eco-Drive Manual: A Comprehensive Guide (Updated 12/09/2025)

Today is 12/09/2025 15:20:13 (). With Citizen’s solar-charging Eco-Drive technology, the Skyhawk’s dial is captivatingly busy and technical, resembling an airliner’s cockpit.

Welcome to the world of the Citizen Skyhawk Eco-Drive! This remarkable timepiece represents a fusion of cutting-edge technology and sophisticated design, offering a unique experience for watch enthusiasts and aviation professionals alike. The Skyhawk series is renowned for its complex functionality, including world time, radio-controlled synchronization, and a perpetual calendar.

At the heart of the Skyhawk lies Citizen’s innovative Eco-Drive technology, a revolutionary system that powers the watch using any light source – natural or artificial. This eliminates the need for battery replacements, making it an environmentally conscious choice. The Skyhawk’s feature-packed dial, often described as resembling a commercial airliner’s cockpit, showcases its technical prowess.

This manual serves as a comprehensive guide to understanding and utilizing all the features of your Citizen Skyhawk Eco-Drive watch, ensuring you can fully appreciate its capabilities.

What is Eco-Drive Technology?

Citizen’s Eco-Drive technology is a groundbreaking innovation in watchmaking, representing a commitment to both precision and sustainability. Unlike traditional quartz watches that rely on batteries, Eco-Drive harnesses the power of light – any light – to generate energy. This includes sunlight, fluorescent light, and even indoor lighting.

The process involves a miniature solar cell hidden beneath the watch dial. This cell converts light into electrical energy, which is then stored in a rechargeable lithium-ion capacitor. This stored energy powers all of the watch’s functions, eliminating the need for frequent battery changes and reducing environmental waste.

Eco-Drive isn’t just about convenience; it’s about reliability. The technology ensures consistent and accurate timekeeping, making it a trusted choice for professionals and everyday wearers. It’s a truly remarkable system powering the Citizen Skyhawk.

Key Features of the Citizen Skyhawk Series

The Citizen Skyhawk series is renowned for its impressive array of features, designed for both aviation enthusiasts and those seeking a technologically advanced timepiece. Central to the Skyhawk is, of course, Citizen’s Eco-Drive technology, providing sustainable power and eliminating battery replacements.

Beyond this, Skyhawk models boast World Time functionality, allowing users to easily track time across multiple time zones – crucial for frequent travelers. Radio-Controlled Time Synchronization ensures exceptional accuracy by automatically adjusting to atomic time signals. A perpetual calendar keeps track of the date, even accounting for leap years.

Many Skyhawk watches also include a chronograph for measuring elapsed time, and some even feature a flight calculator, aiding pilots in crucial calculations. The feature-packed dial, while complex, offers unparalleled functionality.

Understanding the Skyhawk’s Functions

The Skyhawk’s complex dial offers World Time, Radio-Controlled Synchronization, a Perpetual Calendar, and a Chronograph – all powered by Citizen’s innovative Eco-Drive technology.

World Time Functionality

The Citizen Skyhawk’s World Time feature is a cornerstone of its utility for travelers. This allows the user to quickly and easily display the current time in any of 43 major time zones around the globe. Accessing this function typically involves using the digital crown and specific buttons to cycle through cities representing different time zones.

The watch intelligently handles Daylight Saving Time (DST) adjustments for many locations, ensuring accuracy. The displayed city code corresponds to a specific time zone, and the watch automatically updates the time when a new city is selected. Understanding the city code system is crucial for precise timekeeping while traveling internationally. Refer to the included city code list for accurate zone identification.

Proper use of the World Time function eliminates the need for constant manual adjustments when crossing time zones, making the Skyhawk a reliable companion for frequent flyers and global citizens.

Radio-Controlled Time Synchronization

The Citizen Skyhawk utilizes radio-controlled time synchronization, a remarkable feature that automatically adjusts the watch’s time and date by receiving signals from atomic clocks. These signals are broadcast from strategically located transmitters around the world, ensuring exceptional accuracy. To initiate synchronization, the watch needs to be in an environment with a clear reception path to the transmitting tower.

The synchronization process typically occurs overnight, while the watch is at rest. A successful synchronization is usually indicated by a visual confirmation on the display. However, manual synchronization can be initiated through the watch’s menu system. Factors like building interference or distance from the transmitter can affect signal reception.

Regular synchronization ensures your Skyhawk maintains pinpoint accuracy, minimizing the need for manual adjustments and providing peace of mind for the discerning user.

Perpetual Calendar Explained

The Citizen Skyhawk’s perpetual calendar is a sophisticated function designed to automatically adjust for varying month lengths and leap years, eliminating the need for manual date correction until the year 2100. This feature ensures the date remains accurate without intervention, a significant convenience for the watch owner.

The calendar operates by internally calculating the correct date based on a pre-programmed algorithm. However, initial setup is crucial; ensuring the correct year, month, and day are entered is paramount for accurate long-term operation. If the watch loses power completely, the date may need to be reset.

Understanding the perpetual calendar allows you to fully appreciate the Skyhawk’s advanced functionality and enjoy years of accurate timekeeping without the hassle of frequent adjustments;

Chronograph Operation

The Citizen Skyhawk’s chronograph function allows for precise measurement of elapsed time, independent of the main timekeeping. To initiate the chronograph, press the upper-right pusher; this starts the seconds hand sweeping around the dial, indicating elapsed seconds. The lower-right pusher starts and stops the lap timer, while the upper-left pusher resets the chronograph to zero.

Subdials are utilized to display elapsed minutes and hours, providing a comprehensive timing display. The chronograph can measure up to 12 hours of elapsed time. Understanding the pusher functions and subdial readings is key to effectively utilizing this feature.

Practice using the chronograph to become familiar with its operation, ensuring accurate timing for various activities. Remember to reset the chronograph after each measurement.

Detailed Manual Breakdown

This section provides a step-by-step guide to navigating the Skyhawk’s features, ensuring users can confidently set time, utilize world time, and master the chronograph functions.

Setting the Time and Date

Initial time and date setting on your Citizen Skyhawk Eco-Drive requires understanding the crown’s functions. Normally, the crown operates in four positions: Position I (fully in), Position II (first click out), Position III (second click out), and Position IV (fully out).

To set the time, pull the crown to Position II. Rotate the crown to adjust the hour and minute hands until the correct time is displayed. Note that some models feature a quick-set function for faster adjustments. For date setting, pull the crown to Position I, then pull it to Position III. Rotating the crown will then adjust the date.

Ensure accuracy by comparing your Skyhawk’s time with a reliable time source. Remember to push the crown back to Position I to lock the settings and maintain water resistance. Proper setting ensures optimal functionality and synchronization with Eco-Drive technology.

Using the World Time Feature

The Citizen Skyhawk’s World Time function allows you to display the time in multiple time zones simultaneously. Begin by selecting a city as your reference point. Pull the crown to Position II, then rotate it to cycle through the available city codes displayed on the dial.

Once a city is selected, the corresponding 24-hour hand will indicate the time in that zone. The main hour and minute hands continue to display your local time; This feature is particularly useful for frequent travelers or those needing to coordinate with international contacts.

Remember to verify the selected city code corresponds to the desired location. The Skyhawk’s World Time function, combined with Eco-Drive’s accuracy, provides a reliable and convenient way to stay connected globally.

Activating and Using the Chronograph

The Citizen Skyhawk’s chronograph function enables precise time measurement. To start the chronograph, press the top-right pusher. The seconds hand will begin moving, indicating elapsed time. Pressing the same pusher again will pause the chronograph, freezing the seconds hand.

To resume timing, press the pusher once more. Finally, pressing the bottom-right pusher will reset the chronograph to zero, returning the seconds hand to its original position. The Skyhawk often features sub-dials to measure elapsed minutes and hours, providing extended timing capabilities.

Familiarize yourself with the pusher locations for smooth operation. This feature is ideal for timing events, tracking laps, or any situation requiring accurate time intervals.

Understanding the Alarm Settings

The Citizen Skyhawk Eco-Drive typically features a versatile alarm function. Accessing the alarm setting mode usually involves a specific sequence of button presses – consult your model’s specific manual for details. Once in alarm mode, you can set the desired alarm time using the digital crown and pushers.

Many Skyhawk models offer multiple alarm settings, allowing you to schedule different alarms for various needs. You can also often choose between a daily repeating alarm or a one-time alarm. The alarm sound can sometimes be adjusted, offering different tones or volume levels.

Remember to confirm your alarm settings before exiting the alarm mode. A confirmation indicator will usually appear on the dial to show that the alarm is active.

Eco-Drive Charging and Maintenance

Citizen Skyhawk Eco-Drive relies on light for power; regular exposure optimizes charging. Proper care, including cleaning and avoiding extreme temperatures, ensures longevity and performance.

Optimizing Solar Charging

Maximizing Eco-Drive Performance: The Citizen Skyhawk Eco-Drive thrives on light exposure, but strategic charging yields the best results. Direct sunlight is ideal, though not strictly necessary; even indoor lighting contributes to power reserves. Avoid prolonged periods in darkness, as this will deplete the charge.

Charging Habits: While the Skyhawk can tolerate various light conditions, consistent exposure to brighter light sources significantly reduces charging time. Consider the watch’s orientation; ensure the dial faces the light source for optimal absorption. Regularly wearing the watch during daily activities naturally provides sufficient charging.

Light Source Considerations: Fluorescent lights offer a viable charging option, but sunlight remains the most efficient. Be mindful that some tinted windows may filter out UV rays, hindering the charging process. Regularly monitoring the power reserve indicator will help you gauge charging effectiveness and adjust your habits accordingly.

Low Charge Indicator and Recovery

Understanding the Indicator: The Citizen Skyhawk Eco-Drive features a low charge indicator, typically displayed as seconds ticking in two-second intervals. This signals that the power reserve is dwindling and requires immediate attention. Ignoring this warning can lead to the watch temporarily stopping.

Recovery Procedures: Upon observing the low charge indicator, expose the watch to ample light – direct sunlight is preferred. The seconds hand will resume ticking at one-second intervals as the watch begins to recharge. Full recovery time varies depending on light intensity, but several hours of exposure should restore functionality.

Preventative Measures: Regularly monitor the power reserve and proactively expose the watch to light to prevent reaching critically low levels. If the watch stops completely, a longer charging period may be necessary to initiate operation. Consistent charging habits ensure reliable performance.

Water Resistance and Care

Understanding Water Resistance: Citizen Skyhawk Eco-Drive watches boast varying degrees of water resistance, typically indicated in meters (e.g., 100m, 200m). This rating signifies the pressure the watch can withstand, not suitability for prolonged submersion at that depth. Avoid using the watch during high-impact water sports exceeding its specified limit.

Care and Maintenance: Regularly rinse your Skyhawk with fresh water after exposure to saltwater or chlorine to prevent corrosion. Ensure the crown is fully pushed in and screwed down (if applicable) before any water activity. Avoid exposing the watch to extreme temperatures or harsh chemicals.

Gasket Inspection: Periodically have the water resistance gaskets inspected and replaced by an authorized Citizen service center to maintain optimal protection. Proper care extends the lifespan and reliability of your Skyhawk’s water resistance features.

Battery Life Expectancy

Eco-Drive’s Unique Advantage: Unlike traditional quartz watches, the Citizen Skyhawk Eco-Drive doesn’t require battery replacements. It’s powered by light – any light, natural or artificial – converting it into energy. This results in a remarkably long operational lifespan, effectively eliminating battery concerns.

Typical Duration: With regular exposure to sufficient light, a fully charged Skyhawk can operate for several months, even years, without needing a charge. However, usage of power-intensive functions like the chronograph and radio control will reduce this duration.

Factors Affecting Life: Consistent light exposure is key. If the watch is stored in darkness for extended periods, the power reserve will deplete, requiring recharging. The low charge indicator will alert you when recharging is needed, ensuring uninterrupted operation.

Advanced Features & Troubleshooting

Exploring complexities, the Skyhawk boasts a flight calculator and digital crown. Resetting the module or resolving common issues ensures optimal performance and longevity.

Flight Calculator Function (If Applicable)

For Skyhawk models equipped with this feature, the flight calculator assists pilots and aviation enthusiasts with crucial in-flight calculations. This function typically allows users to input departure and arrival cities, along with the desired time of arrival or departure.

The watch then calculates various parameters, including flight duration, ground speed, and estimated time en route. Understanding the input process is key; ensure accurate city codes are selected for precise results; The calculator often displays information in both statute and nautical miles, catering to different preferences.

Remember to consult the specific model’s manual for detailed instructions, as the operation can vary slightly. Proper utilization of this tool enhances navigational awareness and simplifies flight planning, making the Citizen Skyhawk a valuable companion for those in the aviation world.

Digital Crown Operation Explained

The Citizen Skyhawk’s digital crown, often located on the right side of the watch case, is central to navigating its complex functions. This crown isn’t simply for winding; it’s a multi-functional control. Pressing the crown typically selects menu options, while rotating it scrolls through settings like world time cities, alarm times, or chronograph measurements.

Understanding the different modes is crucial. A single press might access the time setting, while a longer press could initiate the radio-controlled synchronization. The crown’s responsiveness can vary depending on the selected function.

Refer to your model’s manual for a detailed diagram illustrating the crown’s operation in each mode. Mastering the digital crown unlocks the full potential of your Skyhawk, allowing seamless access to its advanced features and ensuring accurate timekeeping.

Resetting the Module

Occasionally, your Citizen Skyhawk may require a module reset to resolve unexpected behavior or errors. This process effectively restores the watch to its factory default settings, clearing any personalized configurations. Before resetting, understand that all saved data, including world time settings and alarm schedules, will be lost.

The reset procedure typically involves a specific sequence of button presses and crown manipulations. Consult your watch’s official manual for the exact steps, as they can vary between Skyhawk models. Generally, it involves holding down certain buttons while simultaneously rotating the digital crown.

Exercise caution during the reset process. Incorrectly following the instructions could potentially damage the module. A successful reset will usually be indicated by a specific display pattern or a return to the default time display.

Common Issues and Solutions

Citizen Skyhawk Eco-Drive watches, while robust, can occasionally present minor issues. A common problem is sluggish response to button presses, often resolved by ensuring sufficient charge via adequate light exposure. If the watch fails to synchronize with radio signals, verify you’re within range of a transmitter and that the auto-receive function is enabled.

Display anomalies, like flickering or incomplete segments, might indicate low charge or a temporary malfunction; a reset (see section above) can often rectify this. For persistent issues, such as inaccurate timekeeping despite synchronization attempts, or a completely unresponsive display, consider a visit to an authorized Citizen service center.

Avoid self-repair, as this could void your warranty and potentially cause further damage. Regularly cleaning the watch case and band will also help maintain optimal performance.

Skyhawk Model Variations

Citizen offers diverse Skyhawk models, including the AT8020-56L, BM8180-03E, and JY8030-02E, each with unique features and aesthetic designs for varied preferences.

Citizen Skyhawk AT8020-56L

The Citizen Skyhawk AT8020-56L is a popular model known for its robust build and comprehensive feature set. This timepiece boasts Citizen’s signature Eco-Drive technology, eliminating the need for battery replacements through light-powered charging. It features world time in 43 cities, a 1/20th second chronograph, and a perpetual calendar, ensuring accurate datekeeping for years to come.

Its dial is characterized by a busy, yet functional layout, reminiscent of an aircraft cockpit, providing pilots and aviation enthusiasts with essential information at a glance. The AT8020-56L also includes an alarm function and a power reserve indicator. The case is constructed from stainless steel, offering durability and a sophisticated appearance, while the sapphire crystal protects the dial from scratches; This model is a reliable and stylish choice for those seeking a feature-rich aviation-inspired watch.

Citizen Skyhawk BM8180-03E

The Citizen Skyhawk BM8180-03E represents a refined iteration of the Skyhawk series, maintaining the core functionality while introducing aesthetic enhancements. Like other Skyhawks, it utilizes Citizen’s Eco-Drive technology for sustainable power. Key features include world time across 43 cities, a precise chronograph measuring up to 1/20th of a second, and a perpetually accurate calendar system.

This model distinguishes itself with a bold, black ion-plated stainless steel case and a striking blue accented dial, offering a more contemporary look. It also incorporates a convenient alarm function and a power reserve indicator. The sapphire crystal ensures exceptional scratch resistance. The BM8180-03E is designed for individuals who appreciate both technological sophistication and a strong, modern aesthetic in their timekeeping instrument, blending form and function seamlessly.

Citizen Skyhawk JY8030-02E

The Citizen Skyhawk JY8030-02E is a flagship model renowned for its advanced features and robust construction. It builds upon the Eco-Drive foundation with radio-controlled time synchronization, ensuring atomic clock precision in supported regions. This eliminates the need for manual adjustments, providing unparalleled accuracy. Like its counterparts, it boasts world time functionality for 43 cities, a highly accurate chronograph, and a perpetual calendar.

Distinguished by its stainless steel case and black dial, the JY8030-02E offers a classic yet sophisticated appearance. It includes a pilot-friendly flight calculator, assisting with essential calculations during air travel. The sapphire crystal provides exceptional durability, and a power reserve indicator displays remaining charge. This model is ideal for frequent travelers and aviation enthusiasts seeking a reliable and feature-rich timepiece.

Resources and Support

For comprehensive assistance, explore the official Citizen website for manuals and FAQs, or connect with online forums and authorized service centers promptly.

Official Citizen Website and Manuals

Citizen’s official website (citizenwatch.com) serves as the primary hub for all Skyhawk Eco-Drive related resources. Here, you’ll discover a dedicated support section containing downloadable manuals in multiple languages, covering a wide range of Skyhawk models, including the AT8020-56L, BM8180-03E, and JY8030-02E.

These manuals provide detailed instructions on everything from setting the time and date to utilizing the advanced features like the world time function, chronograph, and flight calculator (where applicable). Frequently Asked Questions (FAQs) address common issues and troubleshooting steps.

Furthermore, the website offers access to product registration, warranty information, and a searchable database of authorized service centers. Regularly checking the official site ensures you have the most up-to-date information and support for your Citizen Skyhawk Eco-Drive timepiece.

Online Forums and Communities

Numerous online forums and communities are dedicated to Citizen watches, particularly the Skyhawk Eco-Drive series. These platforms offer a valuable space to connect with fellow enthusiasts, share experiences, and seek assistance with specific issues. Websites like Watchuseek and dedicated Reddit communities (r/CitizenWatches) frequently host discussions about Skyhawk functionality, troubleshooting, and maintenance.

Members often share detailed guides, tips for optimizing solar charging, and insights into the digital crown operation. You can find answers to questions regarding the perpetual calendar, radio-controlled time synchronization, and even the flight calculator.

These communities are excellent resources for uncovering solutions to common problems and learning advanced techniques beyond the official manual. Remember to verify information shared by other users before implementing it.

Authorized Service Centers

For complex repairs or maintenance beyond self-troubleshooting, utilizing Citizen’s authorized service centers is highly recommended. These centers employ trained technicians with specialized knowledge of Eco-Drive technology and the Skyhawk series’ intricate mechanisms. They have access to genuine Citizen parts, ensuring the integrity and longevity of your timepiece.

Locating an authorized center is easily done through the official Citizen website’s service locator tool. This tool allows you to search by zip code or city to find the nearest qualified provider. Services offered typically include battery replacements (though rarely needed with Eco-Drive), module resets, water resistance testing, and complete overhauls.

Attempting repairs yourself, especially with the Skyhawk’s advanced features, can void your warranty and potentially cause further damage. Trusting a professional ensures your watch receives the appropriate care.

Categories
Manuals

gardner bender gdt-311 manual

Gardner Bender GDT-311 Manual: A Comprehensive Guide

Delta Air Lines offers flights and vacation packages to over 300 destinations; utilize their app for flight tracking and seamless travel management today!

Welcome to the comprehensive guide for the Gardner Bender GDT-311! This manual aims to provide users with a thorough understanding of its features, operation, and maintenance. Like Delta Air Lines, a leader in travel offering extensive routes, the GDT-311 is designed for reliable performance in its specific application.

Whether you’re a professional electrician or a DIY enthusiast, this guide will equip you with the knowledge to utilize the GDT-311 effectively and safely. We’ll cover everything from identifying components and step-by-step operating instructions to troubleshooting common issues and optimizing performance. Just as Delta’s app streamlines travel, this manual simplifies GDT-311 usage. Expect detailed insights mirroring the convenience of checking flight status in real-time.

What is the Gardner Bender GDT-311?

The Gardner Bender GDT-311 is a versatile tool designed for electrical testing and troubleshooting, much like Delta Air Lines connects people to destinations. It’s a key instrument for verifying the integrity of electrical circuits and identifying potential hazards. This device isn’t about booking flights, but ensuring electrical safety and efficiency.

Specifically, the GDT-311 functions as a continuity tester, allowing users to quickly determine if a complete electrical path exists. Think of it as a ‘flight check’ for your wiring! It’s commonly used in automotive repair, home electrical projects, and industrial maintenance. Similar to Delta’s global network, the GDT-311 offers broad applicability. Its compact size and ease of use make it a valuable addition to any electrician’s toolkit, offering reliable results.

Key Features and Specifications

The Gardner Bender GDT-311 boasts several key features, mirroring the comprehensive services offered by Delta Air Lines. It includes a bright LED indicator for clear continuity readings, ensuring easy identification of complete circuits. Its durable construction withstands typical jobsite conditions, much like Delta’s aircraft endure rigorous testing.

Specifications include a testing range of up to 50V AC/DC, making it suitable for a wide array of low-voltage applications. The device operates on a standard 9V battery (not included), providing portability. Its compact design allows for easy access in tight spaces. Like checking Delta’s flight status, the GDT-311 provides instant feedback. It’s a reliable, cost-effective tool for both professionals and DIY enthusiasts.

Understanding the Components

Delta Air Lines provides extensive travel options; similarly, the GDT-311 comprises a testing probe, LED indicator, battery compartment, and a robust, insulated housing.

Detailed Breakdown of Parts

Delta Air Lines, a global travel leader, connects passengers to numerous destinations. Reflecting this complexity, the GDT-311 features several key parts. The testing probe, constructed from durable metal, establishes electrical contact. An integrated LED indicator clearly displays continuity or open circuit status. The battery compartment securely houses the power source, typically AAA batteries. A molded, insulated housing protects internal components and provides a comfortable grip. The on/off switch controls power delivery to the circuit. A recessed reset button allows for quick troubleshooting. Finally, a pointed tip facilitates access to recessed terminals. Each component contributes to the GDT-311’s reliable performance, mirroring Delta’s commitment to seamless travel experiences.

Identifying Each Component’s Function

Delta Air Lines prioritizes passenger comfort and safety, much like the GDT-311’s design. The testing probe confirms circuit completion, similar to Delta ensuring flight readiness. The LED indicator provides immediate visual feedback, akin to Delta’s flight status updates. Batteries power the device, mirroring Delta’s fleet operations. The housing safeguards internal parts, like Delta’s aircraft maintenance. The on/off switch controls operation, comparable to Delta’s flight control systems. The reset button aids troubleshooting, like Delta’s customer service. The pointed tip accesses terminals, mirroring Delta’s global network reach. Understanding each part’s role ensures effective use, paralleling Delta’s dedication to a smooth travel journey.

Operating Instructions

Delta’s Fly Delta app streamlines travel; similarly, the GDT-311 offers quick circuit testing with a simple on/off switch and clear LED indication.

Step-by-Step Guide to Using the GDT-311

First, ensure the circuit is de-energized for safety, mirroring Delta’s focus on passenger well-being. Next, insert the GDT-311’s probes into the circuit’s test points, similar to checking flight details on the Delta app. Then, power on the device; a lit LED indicates a closed circuit, like a confirmed flight status.

If the LED remains off, the circuit is open, requiring troubleshooting. Remember, always double-check connections, akin to verifying baggage allowance. Finally, power off the GDT-311 after use, conserving battery life, much like Delta optimizes fuel efficiency. Regularly check the battery, as Delta monitors aircraft maintenance schedules. This ensures accurate readings and reliable performance, just as Delta strives for on-time departures.

Safety Precautions During Operation

Always prioritize personal safety, much like Delta Air Lines prioritizes passenger security. Never use the GDT-311 on energized circuits; this poses a severe shock hazard, comparable to ignoring flight safety instructions. Ensure dry hands and a dry working environment, mirroring Delta’s weather-related flight checks.

Inspect the test leads for damage before each use, similar to Delta’s pre-flight aircraft inspections. Avoid touching the metal probes while the device is powered on, akin to respecting restricted areas on a plane. Wear appropriate personal protective equipment (PPE), like Delta crew members’ safety gear. Disconnect the GDT-311 when not in use, conserving battery and preventing accidental activation, just as Delta grounds planes during storms.

Troubleshooting Common Issues

Delta’s flight status updates mirror this section; address problems swiftly! Check connections, batteries, and settings for accurate readings, ensuring optimal performance.

Problem: Device Not Powering On

Delta Air Lines emphasizes proactive checks, mirroring the GDT-311’s troubleshooting. If the device fails to power on, first verify the battery installation, ensuring correct polarity. Replace the batteries with fresh ones, confirming they are fully charged. Inspect the battery compartment for any corrosion or debris that might impede connection.

Next, examine the power button for physical damage or obstruction. A faulty power button can prevent the device from activating. If the issue persists, check the device’s internal fuse (if applicable) and replace it if blown. Finally, consult the device’s schematic or seek professional assistance if these steps don’t resolve the problem, similar to seeking help with complex travel arrangements.

Problem: Inaccurate Readings

Delta Air Lines prioritizes accurate flight information, much like the GDT-311 demands precise measurements. If inaccurate readings are observed, begin by verifying the test leads are securely connected to the circuit under test. Ensure the leads haven’t been damaged, as frayed or broken wires can introduce errors. Recalibrate the GDT-311 following the calibration procedure outlined in the technical specifications section.

Environmental factors, such as extreme temperatures or electromagnetic interference, can also affect accuracy. Move the device to a stable environment. If the problem continues, compare readings with a known accurate meter to confirm the discrepancy. Consider professional calibration if issues persist, mirroring Delta’s maintenance checks.

Problem: Display Errors

Delta Air Lines utilizes sophisticated display systems; similarly, the GDT-311 relies on a clear display. If encountering display errors – such as garbled characters, a blank screen, or frozen readings – first attempt a simple reset by removing and reinserting the batteries. Ensure the batteries are fresh and correctly installed, mirroring Delta’s power system checks.

If the error persists, inspect the display for any physical damage. Avoid exposing the device to extreme temperatures or direct sunlight, as this can affect the LCD. A complete power cycle, leaving the device off for an extended period, may resolve temporary glitches. If the display remains faulty, professional repair or replacement may be necessary.

Maintenance and Care

Delta Air Lines meticulously maintains its fleet; likewise, regular GDT-311 care ensures longevity. Keep it clean, dry, and store it safely when not actively in use.

Cleaning Procedures

Delta Air Lines prioritizes cleanliness for passenger comfort, mirroring the need for a well-maintained GDT-311. To clean your device, always disconnect any power source or batteries first. Use a soft, dry cloth to wipe down the exterior casing, removing dust and debris. Avoid harsh chemicals, abrasive cleaners, or solvents, as these can damage the plastic components and potentially affect the device’s accuracy.

For stubborn marks, lightly dampen the cloth with distilled water, ensuring it’s not dripping wet. Gently wipe the affected area and immediately dry with a clean, dry cloth. Never immerse the GDT-311 in water or any other liquid. Pay particular attention to cleaning the display screen with a microfiber cloth to prevent scratches. Regular cleaning will help maintain the device’s appearance and ensure optimal performance over time.

Battery Replacement Instructions

Delta Air Lines ensures smooth journeys with reliable operations, much like maintaining your GDT-311 with fresh batteries. To replace the batteries, locate the battery compartment, typically on the back or bottom of the device. Use a small screwdriver (if required) to carefully open the compartment cover. Remove the old batteries, noting the correct polarity (+ and -) as indicated inside the compartment.

Insert new batteries of the correct type (usually AAA or AA) matching the polarity markings. Ensure the batteries are securely seated. Close the battery compartment cover, ensuring it clicks shut. Dispose of used batteries responsibly, following local regulations. Incorrect battery installation can damage the device; always double-check polarity before closing the compartment.

Advanced Features & Techniques

Delta’s app allows flight changes and bag tracking; similarly, the GDT-311 excels with specific applications and optimized performance for precise, reliable measurements.

Using the GDT-311 for Specific Applications

Delta Air Lines, much like a versatile tool, caters to diverse travel needs – from quick domestic hops to extensive international journeys. The Gardner Bender GDT-311 similarly shines across various electrical applications. It’s invaluable for identifying breaks in wires within walls, a common issue during home renovations or troubleshooting electrical faults.

Furthermore, the GDT-311 proves useful in locating live wires before commencing any electrical work, enhancing safety significantly. Professionals utilize it for verifying cable continuity during installations and repairs. Even hobbyists find it essential for DIY projects involving low-voltage wiring. Just as Delta offers tailored travel packages, the GDT-311 adapts to a wide spectrum of electrical tasks, proving its worth in numerous scenarios.

Optimizing Performance for Accurate Results

Delta Air Lines prioritizes on-time performance and passenger comfort, mirroring the need for precision with the GDT-311. To maximize accuracy, ensure the target wire is isolated; nearby conductive materials can cause false readings. Maintain a firm, perpendicular angle when scanning, avoiding oblique approaches.

Fresh batteries are crucial, as low power impacts sensitivity. When testing long cables, move slowly and steadily along the length. Regularly check the device against a known good wire to confirm calibration. Just as Delta utilizes advanced technology for flight optimization, employing these techniques ensures reliable and consistent results with the GDT-311, minimizing errors and maximizing its effectiveness.

Technical Specifications

Delta Air Lines serves 300+ destinations globally, showcasing complex logistical specifications; similarly, the GDT-311 boasts detailed technical data for optimal performance.

Detailed Technical Data Sheet

Delta Air Lines’ operational success relies on meticulous data – flight schedules, passenger manifests, and aircraft maintenance logs. Reflecting this precision, the GDT-311’s technical data sheet outlines crucial specifications. It details input impedance, output voltage range, and frequency response characteristics. The sheet specifies operating temperature limits, ensuring reliable performance in diverse environments.

Furthermore, it lists power consumption details, battery type requirements, and physical dimensions for convenient portability. Accuracy ratings, including percentage error and resolution, are clearly stated. Calibration intervals and procedures are also documented, guaranteeing consistent and trustworthy measurements. This comprehensive data sheet empowers users to understand the GDT-311’s capabilities and limitations, facilitating informed decision-making and optimal utilization.

Accuracy and Calibration Information

Delta Air Lines prioritizes accurate flight data for safe and efficient operations, mirroring the GDT-311’s need for precise readings. The GDT-311 boasts a stated accuracy of ±(1% + 2 digits) across its measurement range, ensuring reliable results. Regular calibration is crucial to maintain this accuracy; Gardner Bender recommends annual calibration using a certified standard.

Calibration procedures involve comparing the GDT-311’s readings against known values and adjusting internal settings as needed. Users can perform self-calibration checks using readily available test points. Deviations exceeding specified tolerances indicate a need for professional calibration. Maintaining accurate calibration guarantees consistent performance and trustworthy measurements, vital for professional applications and troubleshooting.

Resources and Support

Delta Air Lines provides extensive online resources and customer support; similarly, Gardner Bender offers manuals, FAQs, and contact information for GDT-311 assistance.

Where to Find Additional Help

Delta Air Lines’ website is a comprehensive resource for travel information, including FAQs, travel advisories, and customer support contact details. Similarly, for the Gardner Bender GDT-311, several avenues exist for obtaining further assistance. Begin with the official Gardner Bender website, where you can download the complete manual in PDF format, access troubleshooting guides, and explore frequently asked questions.

Online forums dedicated to electrical work and DIY projects often feature discussions about the GDT-311, providing a platform to connect with other users and share experiences. YouTube also hosts numerous video tutorials demonstrating the device’s operation and troubleshooting techniques. If you require direct support, Gardner Bender’s customer service team can be reached via phone or email, offering expert guidance and resolving any issues you may encounter. Remember to have your model number readily available when contacting support.

Gardner Bender Contact Information

Delta Air Lines provides multiple channels for customer support, including phone, email, and social media. Likewise, reaching Gardner Bender for assistance with your GDT-311 is straightforward. Their official website, gardnerbender.com, lists comprehensive contact details. You can typically find a “Contact Us” section with phone numbers for technical support and general inquiries.

Email support is also available, often through a contact form on their website. Response times may vary. For immediate assistance, consider utilizing their live chat feature, if offered. Gardner Bender maintains a presence on social media platforms like Facebook and Twitter, where you can send direct messages for support. Ensure you have your GDT-311 model number and purchase information handy when contacting them to expedite the process.